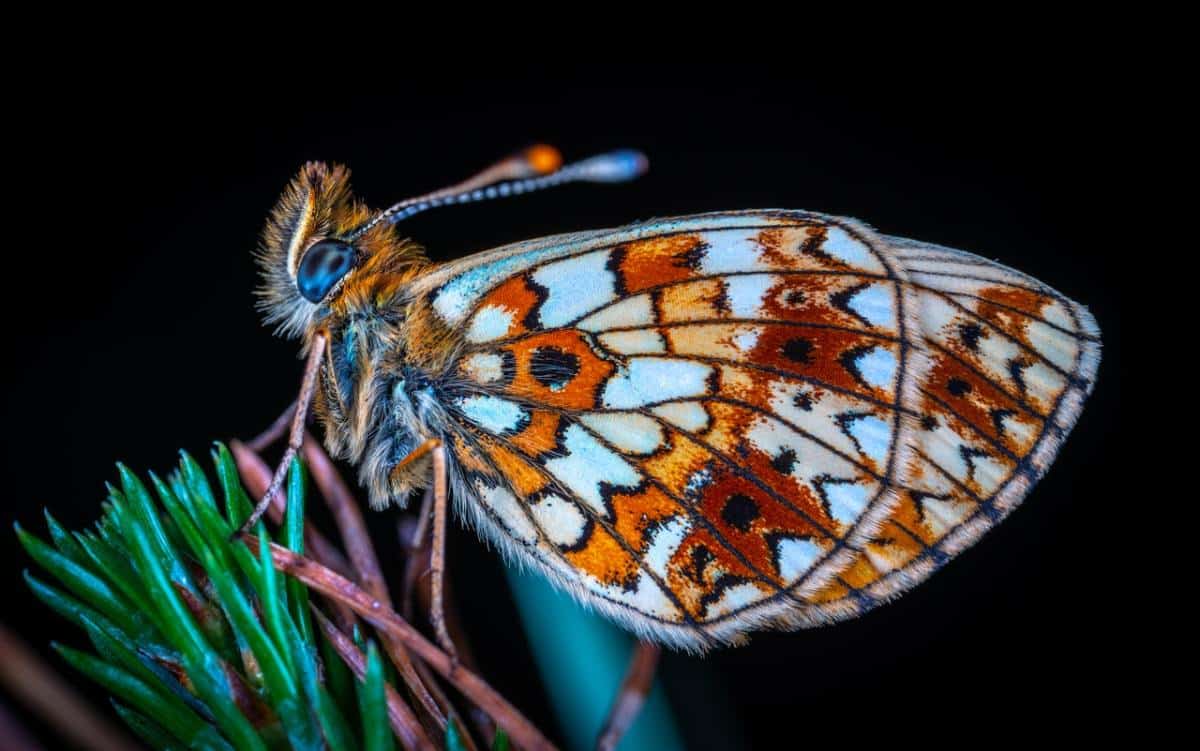
What is Macro Photography?
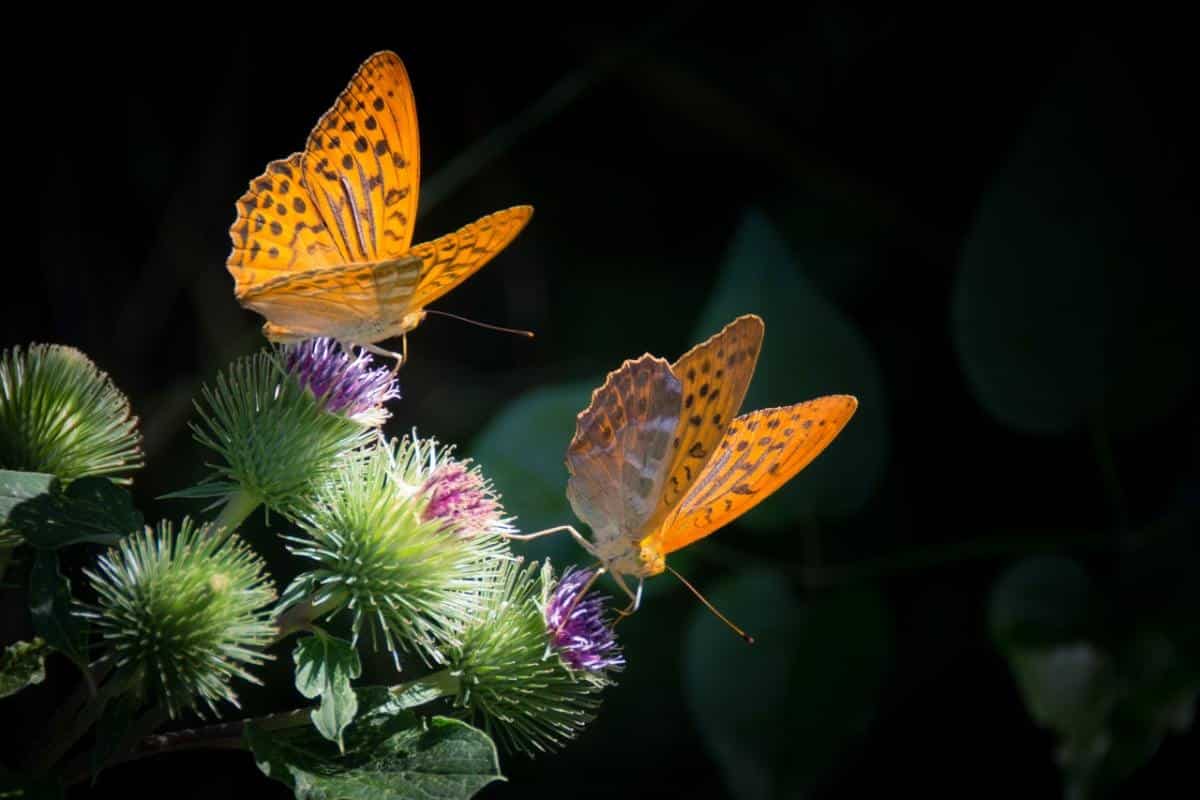
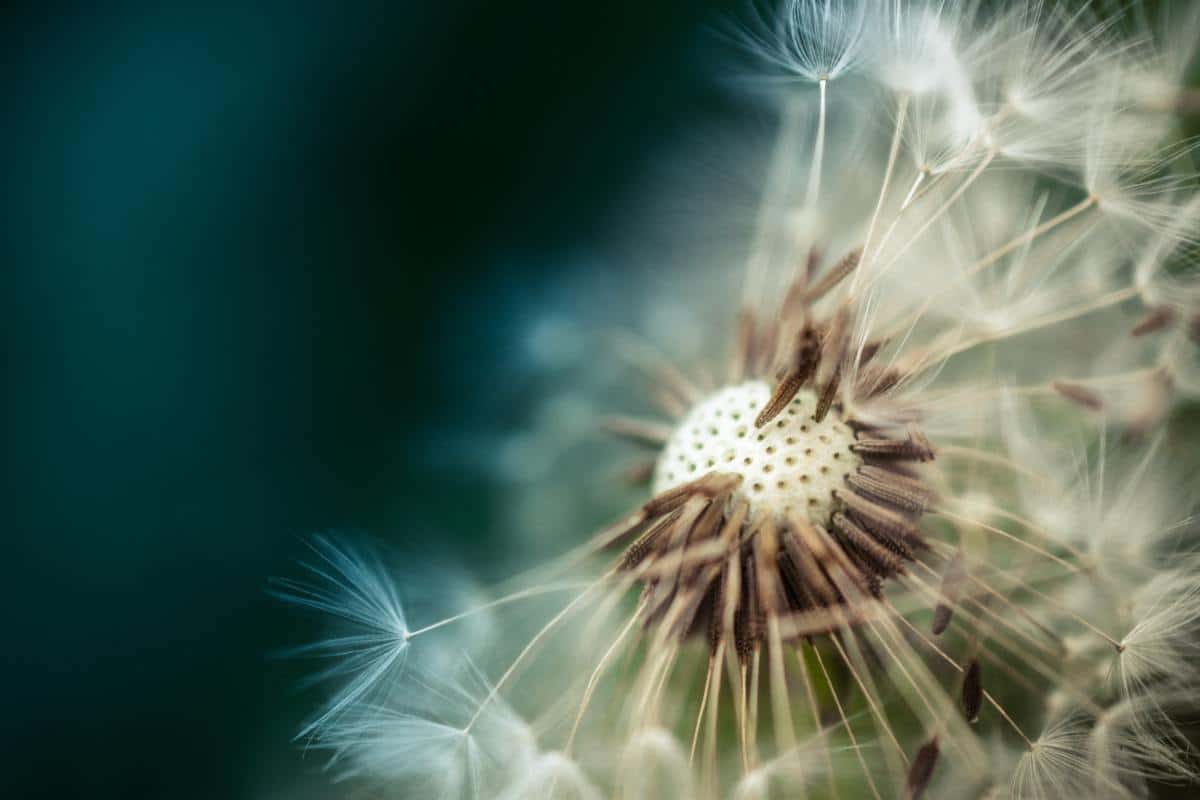
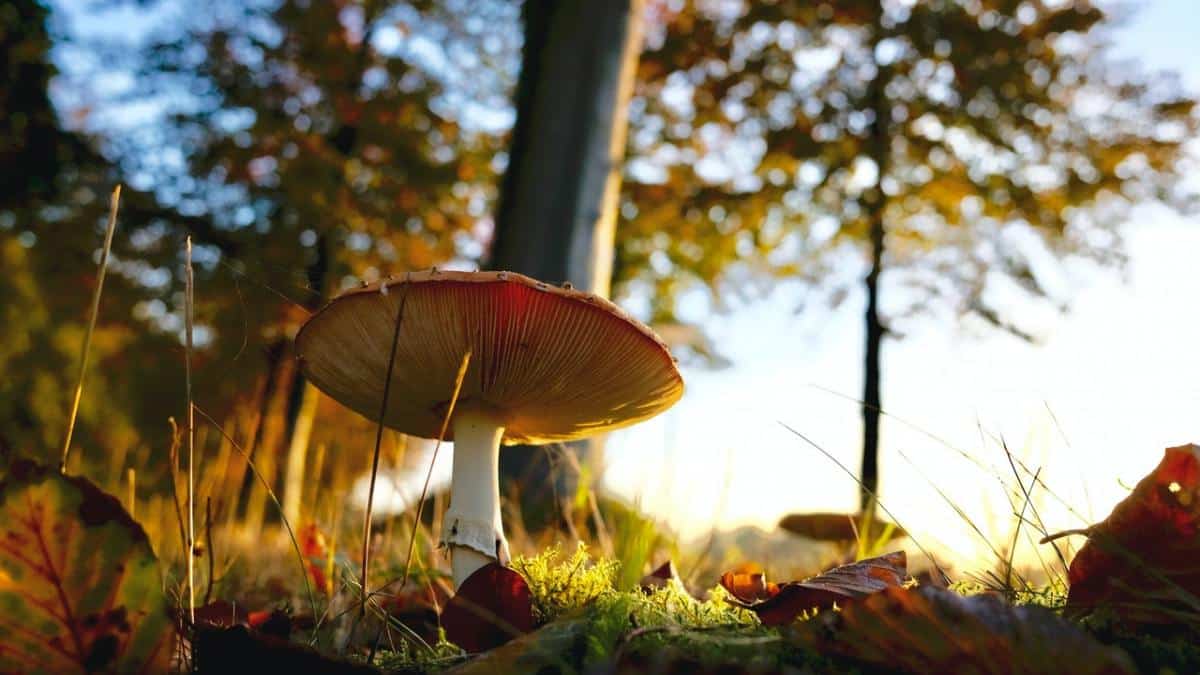
Macro photography, also known as close up photography, is the art of making small things look big, or macro. In technical terms, macro images reproduce the subject at a magnification ratio of at least 1:1, where the image in the camera sensor is the same size or bigger than the real-life thing. Macro photographers tend to shoot small things like insects, flowers, water droplets or even miniature scenes and make them appear large or life size. The cool thing about macro photography is that you can take pretty much anything small and shoot it in a way where it appears literally larger than life.
This type of photography can be a great way to stretch your shooting skills and capture subjects close up, in all their intricacy and beauty, for your online portfolio website or just for fun.
Micro vs. Macro Photography
Though “macro” means to make larger, and “micro” means to make smaller, these two types of photography actually refer to the same technique. Both macro and micro photography refer to shooting a subject close up so they appear life size. However, the difference between micro and macro photography is the magnification ratio applied to the subject. Micro photography uses a magnification ratio of 20:1 or higher, so the subject is magnified so it appears 20 times larger than real-life. In macro photography, the ratio is 20:1 or lower.
To achieve such a high magnification ratio, micro photographers will connect their camera to a microscope to get the shot, often of microbes so small that they appear invisible to the naked eye. For this reason, micro photography is less run of the mill and tends to be a specialized field of photography. Comparably, macro photographers can use more accessible tools like camera settings, lenses, extension tubes, and other equipment to get the close up, life size effect.
Let’s take a closer look at the gear you’ll need to shoot stunning macro photos.
Equipment for Macro Photography
Shooting macro images does not require any specialized equipment, but you do need to select the right type of gear to get the desired effect. The key items you will need for macro photography are:
A Digital or Mirrorless Camera
Macro photography is achieved by having specific lens, so you will need a camera that can hold the lens. A point and shoot camera can be used for macro photography, particularly if you’re on a budget and are just starting to dabble in the technique. Most point and shoot cameras will have a “macro mode” setting that allows you to do close focusing and capture subjects in macro.
If you’re looking to invest in macro photography and want more options when you shoot, go for a DSLR (digital single-lens reflex) camera. Having a DSLR camera will allow you to shoot a variety of macro photos and try out different lens to get the macro effect. A DSLR camera will also have a full-frame or cropped sensor, which will give you more focal length so you can zoom in really close to your subject.
Another option is a mirrorless camera, as they will have a focus peaking feature that shows you which parts of the object are in focus, a handy tool for macro photography. If you go for a mirrorless camera, make sure it has an electronic viewfinder, as it will help you keep the camera steady and get clear, detailed macro shots.
Lens
Once you’ve settled on your camera, you’ll need to find a lens to take macro photography well. Your lens will determine how macro your images appear, a key piece of equipment.
Invest in a Macro Lens
Go for a dedicated lens made specifically for macro photographs to make shooting this technique quick and easy. A standard macro lens will have focal lengths between 90 to 105mm and 1:1 magnification, though some lenses have shorter focal lengths with shorter working distances. Keep in mind the shorter the focal length, the closer you will need to be to your subject to get a good shot.
Having a macro lens with a shorter focal length of 50mm – 60mm will work great for shooting plants, flowers, and smaller inanimate objects at a close distance. However, if you plan to shoot insects or wildlife at a further distance, invest in a macro lens with a longer focal length of 100mm or more.
Both Canon and Nikon sell macro lenses that will fit most digital camera bodies. You can also try macro lenses by Nikon, Lecia, or Canon that are fully manual, as these lenses will help you get a good manual focus on your subject. Macro lenses are useful for good macro imaging, but they can also be used for different types of photos, from portraits to food shots. So they may be a valuable addition to your kit if you work in other areas as a photographer.
Reverse a 50mm Prime Lens
This option is handy if you already own a 50mm fixed focus length or prime lens and don’t want to invest in a macro lens. Simply remove the lens from your camera and turn it around so the front side of the lens faces the camera. This technique works because it reverses the usual operation of the 50mm lens, so that instead of focusing far away and making an image smaller, it does the opposite, magnifying the object to near life-size.
If you possess a steady hand, you can try free lensing this technique by holding the lens against the camera body when you shoot, a quick fix for a point and shoot as well as a DSLR. If you’re looking for a more stable or permanent setup, buy a threaded adaptor for your camera called a reversing ring at your local photography store or online. You can then attach the reversing ring to the lens and your camera to hold the lens in place.
You can try this technique with most prime lens, though the 50mm lens often gets the best results.
Extension Tubes
If you have a DSLR, you can adapt it for macro using extension tubes. Extension tubes are hollow cylindrical spacers you place between the lens and the camera mount to increase the extension capacity of your lens. There are no optics in them and their primary purpose is to change your lens’ minimum focus distance, or how close you can be to your subject and avoid a blurry or unclear image.
Cheaper, more basic extension tubes act as spacers with no electrical connection between your lens and your camera body. More expensive versions have electrical connections that preserve the communication between your lens and your camera, so you can adjust the aperture setting and exposure while using them.
Extension tubes are usually sold in sets of three in varying sizes and prices vary from $20 to $100 depending on the brand and type. You can use each tube on their own or attach several to your lens to get longer length. Longer ones will make it easier for you to get closer to an object with a steady focus, and create a higher magnification of it with your lens.
Extension tubes are flexible, versatile tools for macro photography, however they do result in some light loss in your images. You can adjust your camera settings using automatic exposure mode to compensate for this issue.
Tripod
When you shoot macro, you will need to have a steady hold on your camera to avoid any shakes or bumps, as they can disrupt the image. Avoid blurry images by investing in a tripod for your macro photography setup, particularly if you are shooting subjects at a far distance. Invest in a standard tripod with a mount and stable legs that fits your camera body. You’ll get good use out of it, as you can use your tripod to shoot other types of photography, such as landscape or portrait.
Other Accessories for Macro Photography
Two other accessories you may consider investing in for a macro shoot are a remote shutter release and a ring light.
A remote shutter release is a tool that attaches to your camera body and allows you to release the shutter without touching your camera. It’s a great way to avoid shaking or jolting your camera when you take macro shots.
A ring light is a simple, cheap light that fits over the lens of your camera. It’s a handy way to ensure you shine enough light on your subject to counteract the narrow aperture setting needed when shooting macro.
Shooting in Macro
Having the right equipment for macro photography is just one piece of the puzzle. Put your gear to good use with some key techniques to shooting macro and getting the most out of your setup.
Check Your Working Distance
To get good macro shots, position your camera preferably on a tripod, and find your subject, ideally on a place where it does not move too much. Then, before you focus, check your working distance to get the best shot. Your working distance is the distance between the front of your lens and your nearest subject. If you have a working distance that is too small, you will likely scare off your subject or block the light because you are positioned too close.
Your working distance also depends on the focal length of your lens. A lens with a longer focal length of 180mm to 200mm will give you a longer working distance. A lens with a shorter focal length of 150mm and below will have a shorter working distance.
In general, you want to make sure your working distance is at least six inches, or 15 centimeters, to ensure you have enough space to shoot your subject and get a good shot.
Create a Balanced Depth of Field
The depth of field is the area where the focus is sharpest when you focus your lens. In macro photography, depth of field is a tricky thing to get right because the closer you move to your subject, the shallower your depth of field becomes. As a result, it can be difficult to get the entirety of the object in focus when shooting macro.
If you’re using a point and shoot for macro photography, there is not much you can do to adjust your shallow depth of field beyond adjusting your working distance from your subject.
For DSLR users, you can increase the depth of field through a decrease in your aperture setting by choosing the larger f-number. An f-stop of between f/8 and f/16 is typically used for macro photography. You can also bump up your camera’s ISO to increase the shutter speed and get a clearer image. An increase in the ISO can cause some visual noise in the image, so adjust this setting slowly and with care.
Probably the most foolproof way to address the dilemma of the depth of field for macro shots is to shoot a lot and get very familiar with your camera’s settings and capabilities. By shooting often, and shooting different subjects, you will get a better sense of what combination of aperture, depth of field, and ISO works best for your macro images.
Move Your Subject, Not the Camera
In macro photography, the lens will be positioned close to the subject and often will be stabilized on a tripod or flat surface. Rather than move the camera or re-frame the object, move it instead to make shooting more efficient. Place your subject, such as a flower or a coin, on a surface and move it slightly right or left to change the angle of the shot. Then, refocus and shoot.
Most beginner macro photographers will begin by shooting parallel to the subject and then move it around once they get more confident. Make sure the area around the object is clean and tidy, especially as you move it around. In macro images, even the smallest hair or thread can show up in the frame.
Try to get a variety of different angles of the object by shifting it slightly side to side. Often, even the smallest movement of your subject can create an entirely different shot in macro photography.
Manage Your Shutter Speed
When you shoot macro, you will need to shoot at a slower than normal shutter speed to capture the image. Using a tripod will help to avoid any of the shaking or blurriness that can happen with a slow shutter speed. You will also need to pay attention to the background of your images for any motion, such as a breeze from the wind outside. If you are shooting plants or insects outdoors, you might notice a blur in the background due to the wind blowing plants or trees as you took the shot. Block the wind with a screen or ask someone to hold any plants in the frame steady to avoid this issue.
As well, if you are shooting living things in macro, such as an insect, they tend to move on their own a lot. To avoid blurriness with a slow shutter speed, you may need to be patient and wait for the moment the insect stops moving to get your clear shot.
Diffuse Your Light
Lighting your macro shots can often be done by tapping into natural light, particularly if you are shooting outdoors. But you will need to be wary of on-camera flashes, as it can cause a shadow of your camera or lens to appear in the shot. You can address this issue by diffusing your flash by bouncing it off a whiteboard or another diffusion surface. Diffusing the flash will create a softer light in the image and fills up the frame with enough light to capture the object clearly.
Use Manual Focus
Though it may seem old school to use manual focus for macro shots, it will help you get the best shots possible. Point and shoot users won’t have this option, but if you are using a DSLR, try focusing the camera yourself on your subject rather than rely on your camera’s autofocus setting. Your camera’s autofocus can’t do quick movement tracking when you are positioned extremely close up in your shots.
If you’re using a point-and-shoot camera manual focus isn’t going to be an option, but if you’re using a DSLR you can get the best macro shots by doing the focusing yourself, rather than relying on your camera’s autofocus capability.
Try Focus Stacking
If you are still struggling with a shallow depth of field and getting an object in focus, try a method called focus stacking. This is a method where you combine the in-focus areas from a sequence of images to get a final, focused shot. For example, say you are taking a picture of a pretty, fuzzy bee. When you frame the shot, you might notice its head is in focus but its wings and body are not. With focus stacking, you would take three separate shots of its head, wings, and body, and combine them into one final image where the entire bee is in focus.
There is software that allows you to combine different images together to create a clear shot, often for free, such as Stack Focuser or CombineZ. You can also combine the images in Adobe Photoshop to get the desired, in focus look.
Highlight Your Macro Photography in Your Online Portfolio
Now that you know how to create macro images, have fun taking small things and making them appear life-size. After you have a few great looking macro photos, highlight them in an online portfolio website so you can show them off to peers and clients.
Don’t have an online portfolio yet? Use a website builder to build one in 10 easy steps and highlight your edited images.
Pick one that has gorgeous themes to choose from, and offers features like a built-in blog and online store, plus client proofing.
This way, you can show off your macro in photography skills and round out your portfolio.
Looking for other photography resources?
How to Create Glitch Art Photos