


There is something deeply satisfying about a well-composed flat lay. Every object sits exactly where it should. The light falls evenly. The frame feels balanced but not rigid. It looks effortless, which is precisely what makes it so difficult to pull off.
Flat lay photography has moved well beyond Instagram trends. It is now a core visual format for food photographers, product brands, fashion editorials, wedding storytelling, and creative portfolios. Whether you are building content for a client or refining your personal body of work, the flat lay is one of the most versatile tools in a photographer’s visual vocabulary.
This guide breaks down the styling decisions, composition strategies, and practical setup choices that separate a thoughtful flat lay from a cluttered overhead shot. No expensive studio required.
What Is Flat Lay Photography?
Flat lay photography is a style of image captured from directly above, with the camera pointing straight down at a curated arrangement of objects on a flat surface. It is sometimes called “bird’s eye” or “overhead” photography.
The format is popular because it gives the photographer total control over the frame. There is no depth of field to manage in the traditional sense, no background distractions, and no perspective distortion from shooting at an angle. Every element you place in the scene is a deliberate design choice.
That control is also what makes flat lays challenging. When everything is visible and nothing is hidden by depth, every detail matters: the gap between objects, the wrinkle in a fabric, the shadow direction, the ratio of empty space to filled space.
Every great flat lay tells a story. So should your portfolio. See what you can build with Format, free.
Start with a Story, Not a Surface
The most common flat lay mistake is jumping straight into arrangement before deciding what the image is actually about.
Before you pick up a single prop, ask yourself: What is the mood here? A dark, moody flat lay of leather-bound journals and fountain pens tells a different story than a bright, airy arrangement of skincare products on marble. Both can be beautiful, but only if the mood is intentional from the start.
Think of your flat lay as a single frame from a larger narrative. If this image appeared in a magazine spread, what would the article be about? That question will guide your color palette, prop selection, background choice, and lighting approach before you ever press the shutter.
A few starting questions that help:
- Who is this for? A client, your portfolio, social media, an editorial pitch?
- What feeling should it evoke? Warmth, luxury, simplicity, nostalgia, energy?
- Is there a hero object? One item that everything else supports?
When the story is clear, the styling decisions become intuitive.
Styling Fundamentals

Choosing Your Hero Object
Every strong flat lay has a focal point. This is the hero object: the item the viewer’s eye should land on first.
It might be a perfume bottle, a cookbook, a pair of earrings, or a plated dish. Whatever it is, give it prominence through size, position, or contrast. If you are shooting for a brand or client, the hero is almost always the product itself.
A common mistake is giving equal visual weight to every item in the frame. When everything competes for attention, nothing wins.
Building Layers with Supporting Props
Supporting props add context and texture without stealing focus from the hero. Think of them as the supporting cast in a scene.
For a coffee flat lay, the hero might be a ceramic mug. The supporting props could include a folded linen napkin, a small spoon, a few scattered coffee beans, and the corner of a book. Each item reinforces the mood without demanding center stage.
When choosing props, work in odd numbers. Groups of three or five tend to feel more natural and visually interesting than even groupings. And vary the scale: mix small, medium, and large objects to create a sense of depth even in a two-dimensional frame.

Textures, Colors, and Visual Weight
A flat lay lives or dies on its textural contrast. Smooth ceramics next to rough linen. Matte paper against glossy packaging. Soft petals beside hard metal.
Color works the same way. You do not need a dozen hues. Pick two or three colors that support your mood, then use variations and neutrals to fill in. A controlled palette always reads more intentionally than a rainbow of competing tones.
Visual weight refers to how “heavy” an element feels in the frame. Dark, dense, or large objects carry more weight than light, small, or transparent ones. Distribute visual weight across the frame to avoid the image feeling lopsided.
Composition Techniques That Actually Work
Composition is where flat lay photography becomes genuinely creative. The overhead perspective gives you a blank canvas, and the arrangement of objects within that canvas determines whether the image feels considered or chaotic.
The Rule of Thirds (and When to Break It)
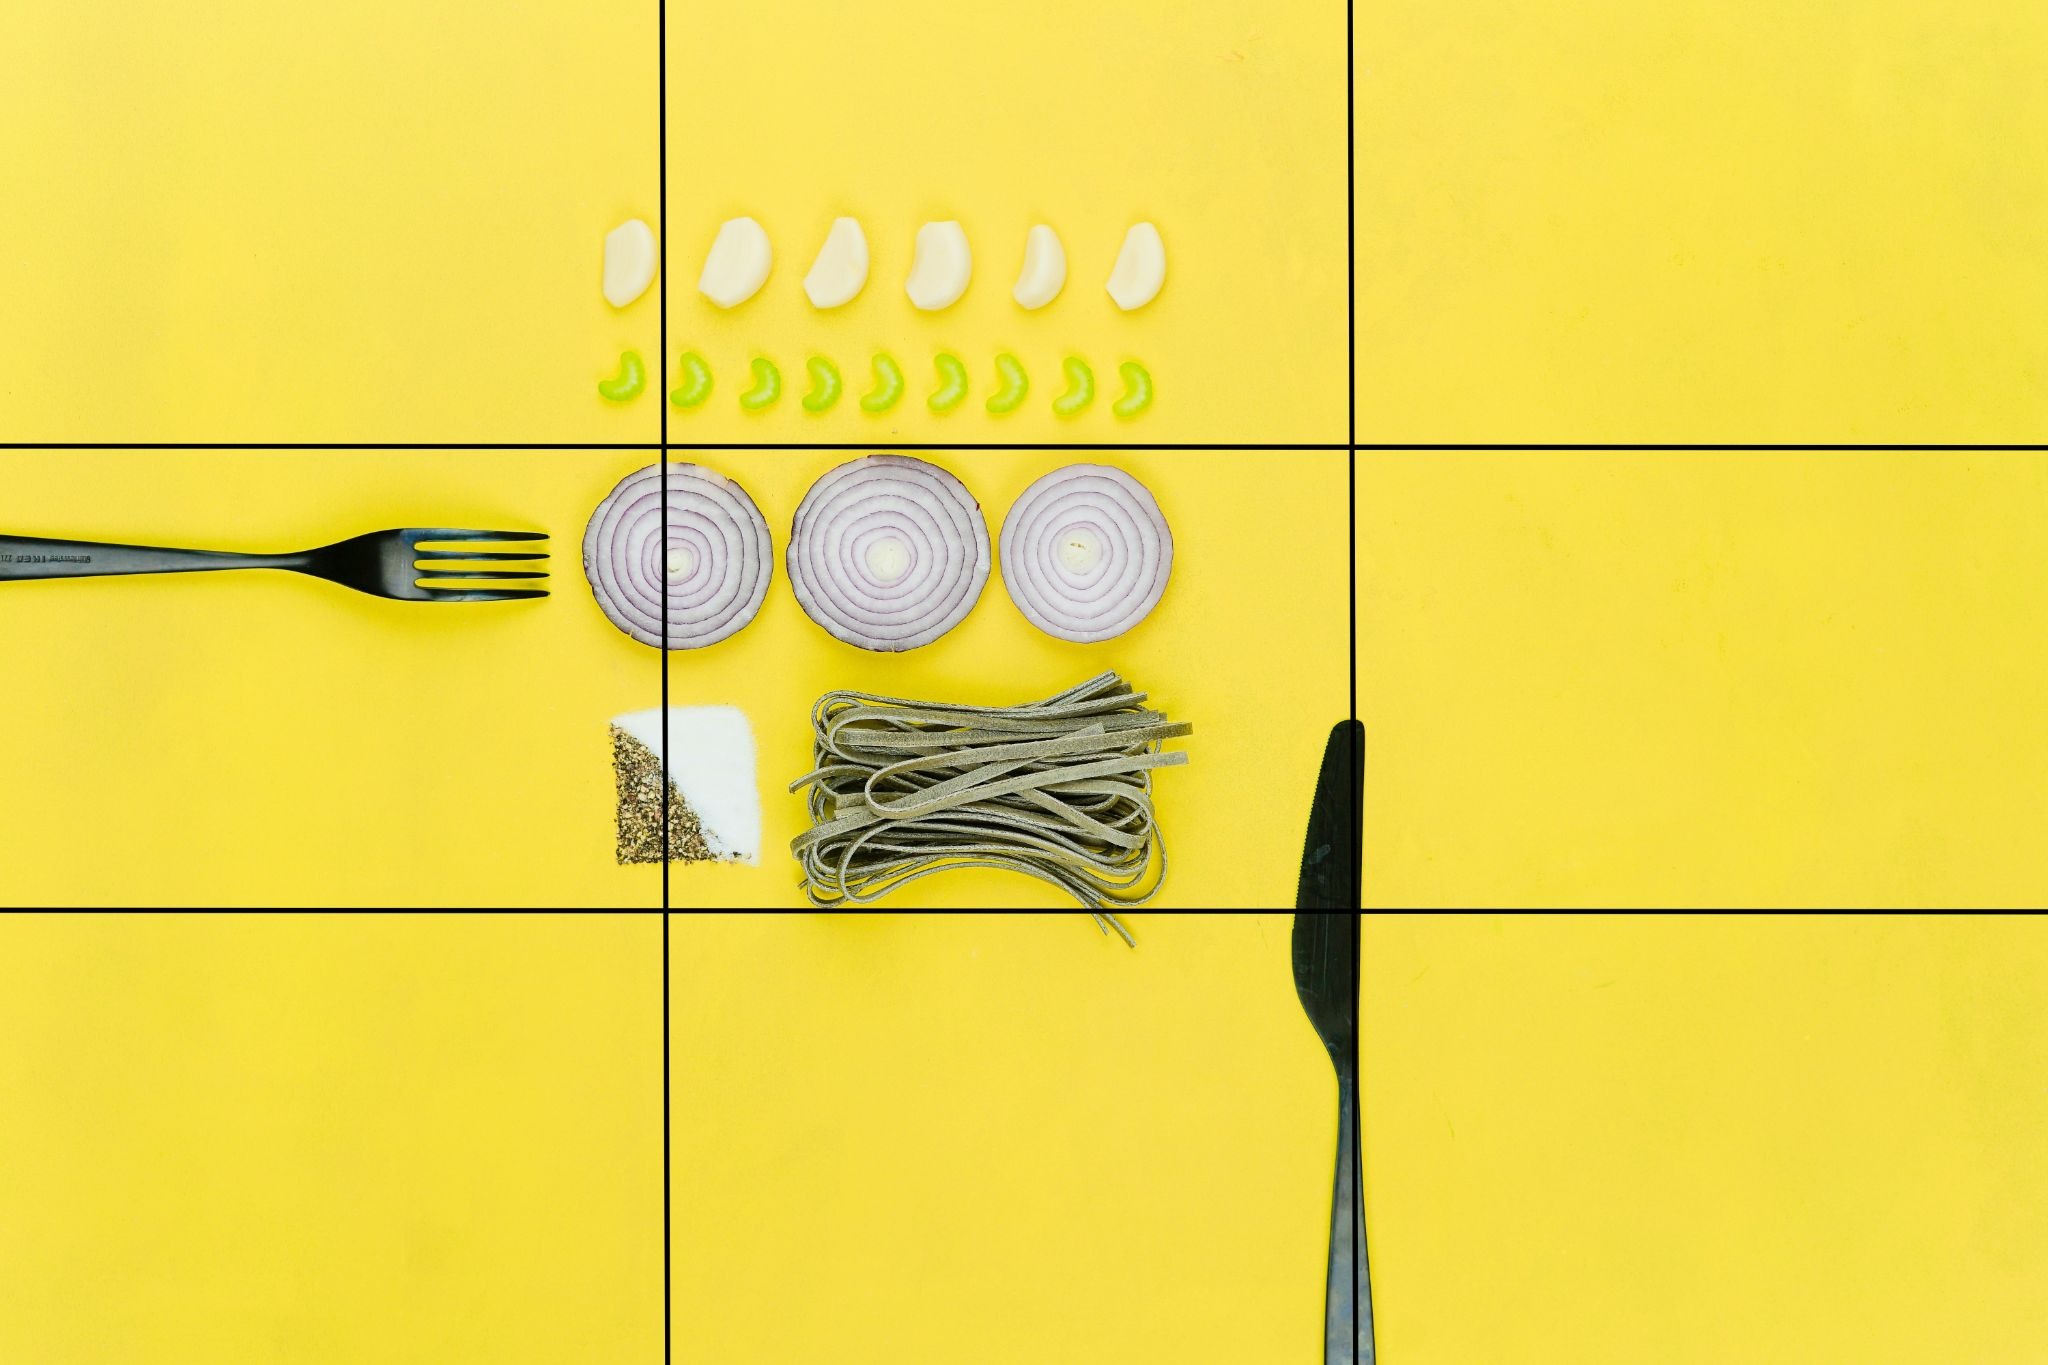
The rule of thirds remains one of the most reliable composition frameworks. Mentally divide your frame into a 3×3 grid and place your hero object along one of the intersecting points rather than dead center. This creates natural visual tension and gives the eye a path to follow.
That said, centered compositions work beautifully for flat lays that emphasize symmetry or minimalism. The key is making the choice deliberately. If you are centering your subject, commit to it. If you are using the rule of thirds, give the off-center placement room to breathe.
For a deeper exploration of composition techniques in photography, including frameworks beyond the rule of thirds, Format’s composition guide covers eight essential approaches worth experimenting with.
Symmetry vs. Controlled Asymmetry
Symmetrical flat lays feel orderly, clean, and premium. They work especially well for product grids, gift guides, and organized collections. If you go this route, precision matters. Use a ruler or grid overlay to ensure consistent spacing.
Asymmetrical layouts, on the other hand, feel more organic and editorial. Objects are arranged to create visual flow rather than mirror-image balance. The trick with asymmetry is “controlled chaos”: it should look effortless but still feel balanced.
A practical test: squint at your layout. If one side of the frame feels noticeably heavier than the other, redistribute.
Diagonal Lines and Movement
Diagonal lines are one of the most underused tools in flat lay composition. Placing objects along a diagonal creates a sense of movement and energy that straight rows cannot.
Try angling a pen, a ribbon, or the edge of a notebook so it leads the eye from one corner of the frame toward the hero object. Even small diagonal elements can make an otherwise static scene more dynamic.
Negative Space as a Design Tool
Negative space is the empty area surrounding your objects. Many beginners try to fill every inch of the frame, but restraint is often what makes a flat lay feel professional.
Negative space creates breathing room. It emphasizes your hero object. And practically speaking, it leaves room for text overlays if the image will be used in marketing, social media, or editorial layouts.
When in doubt, remove one prop from your arrangement. The image almost always improves.
Lighting for Flat Lays
Natural Light Setups
Natural light from a large window is the most accessible and forgiving light source for flat lay photography. It produces soft, even illumination that looks clean without appearing clinical.
Position your surface near the window so the light falls across the scene from one side. Avoid placing your setup directly under the window, which creates flat, shadowless light that can make the image feel lifeless.
The best natural light for flat lays is bright but indirect. Overcast days are ideal. On sunny days, diffuse the light by taping a sheet of white fabric, tracing paper, or a sheer curtain over the window.
Controlling Shadows and Reflections
Shadows add depth and dimension to a flat lay, but harsh shadows can be distracting. To soften shadows on the opposite side of your light source, place a white foam board or piece of card as a reflector. This bounces light back into the darker areas without eliminating shadows entirely.
If you are shooting glossy or reflective objects (glass bottles, jewelry, packaging), watch for unwanted reflections of your camera or surroundings. Shooting through a hole cut in a large white board can help eliminate those reflections while maintaining even light.
Secondo research published by the Rochester Institute of Technology, the quality of light, specifically its softness and directionality, is the single greatest factor influencing how viewers perceive texture and material quality in product imagery.

Backgrounds and Surfaces
Your background sets the entire tone. A warm wood surface says something different than white marble, concrete, or a linen tablecloth.
Popular flat lay backgrounds and what they communicate:
| Sfondo | Stato d'animo | Works Well For |
|---|---|---|
| White marble | Clean, premium, modern | Beauty, skincare, jewelry |
| Natural wood | Warm, organic, rustic | Food, lifestyle, craft |
| Concrete/slate | Moody, industrial, editorial | Fashion, tech, minimalist products |
| Linen or fabric | Soft, intimate, handmade | Stationery, florals, lifestyle |
| Solid color paper | Graphic, bold, brand-aligned | Product photography, social content |
You do not need to invest in expensive purpose-built surfaces. A cutting board, a piece of fabric from a craft store, or a painted plywood panel can work beautifully. What matters is that the surface matches your story.
Camera Setup and Settings
The defining technical requirement of flat lay photography is shooting at a true 90-degree overhead angle. Even a slight tilt will create perspective distortion that makes objects at the edges of the frame look skewed.
For phone shooters: Most modern smartphones handle flat lays well. Use the grid overlay in your camera app to check alignment. Hold the phone parallel to the surface, arms extended, and keep it steady.
For camera shooters: Mount your camera on a tripod with an adjustable horizontal arm, or use a copy stand. A focal length between 35mm and 50mm (full-frame equivalent) gives a natural perspective without barrel distortion.
Key settings for sharp flat lays:
- Apertura: f/5.6 to f/8 for edge-to-edge sharpness
- ISO: As low as possible (100 to 400) to minimize noise
- Shutter speed: Use a tripod and remote trigger to allow slower shutter speeds in natural light without camera shake
- Focus: Manual focus or tap-to-focus on your hero object
Wedding photographer flat lay tips: On a busy wedding day, a tripod isn’t typically realistic. Create your flat lay on a low surface or the floor in an undisturbed area with good natural light, get it as straight as possible, and adjust the perspective during editing if needed. Be prepared; you may need to do a couple quick flat lay setups featuring different special items for each partner in their getting ready spaces.
Flat Lay Ideas by Niche
Food and Recipe Photography
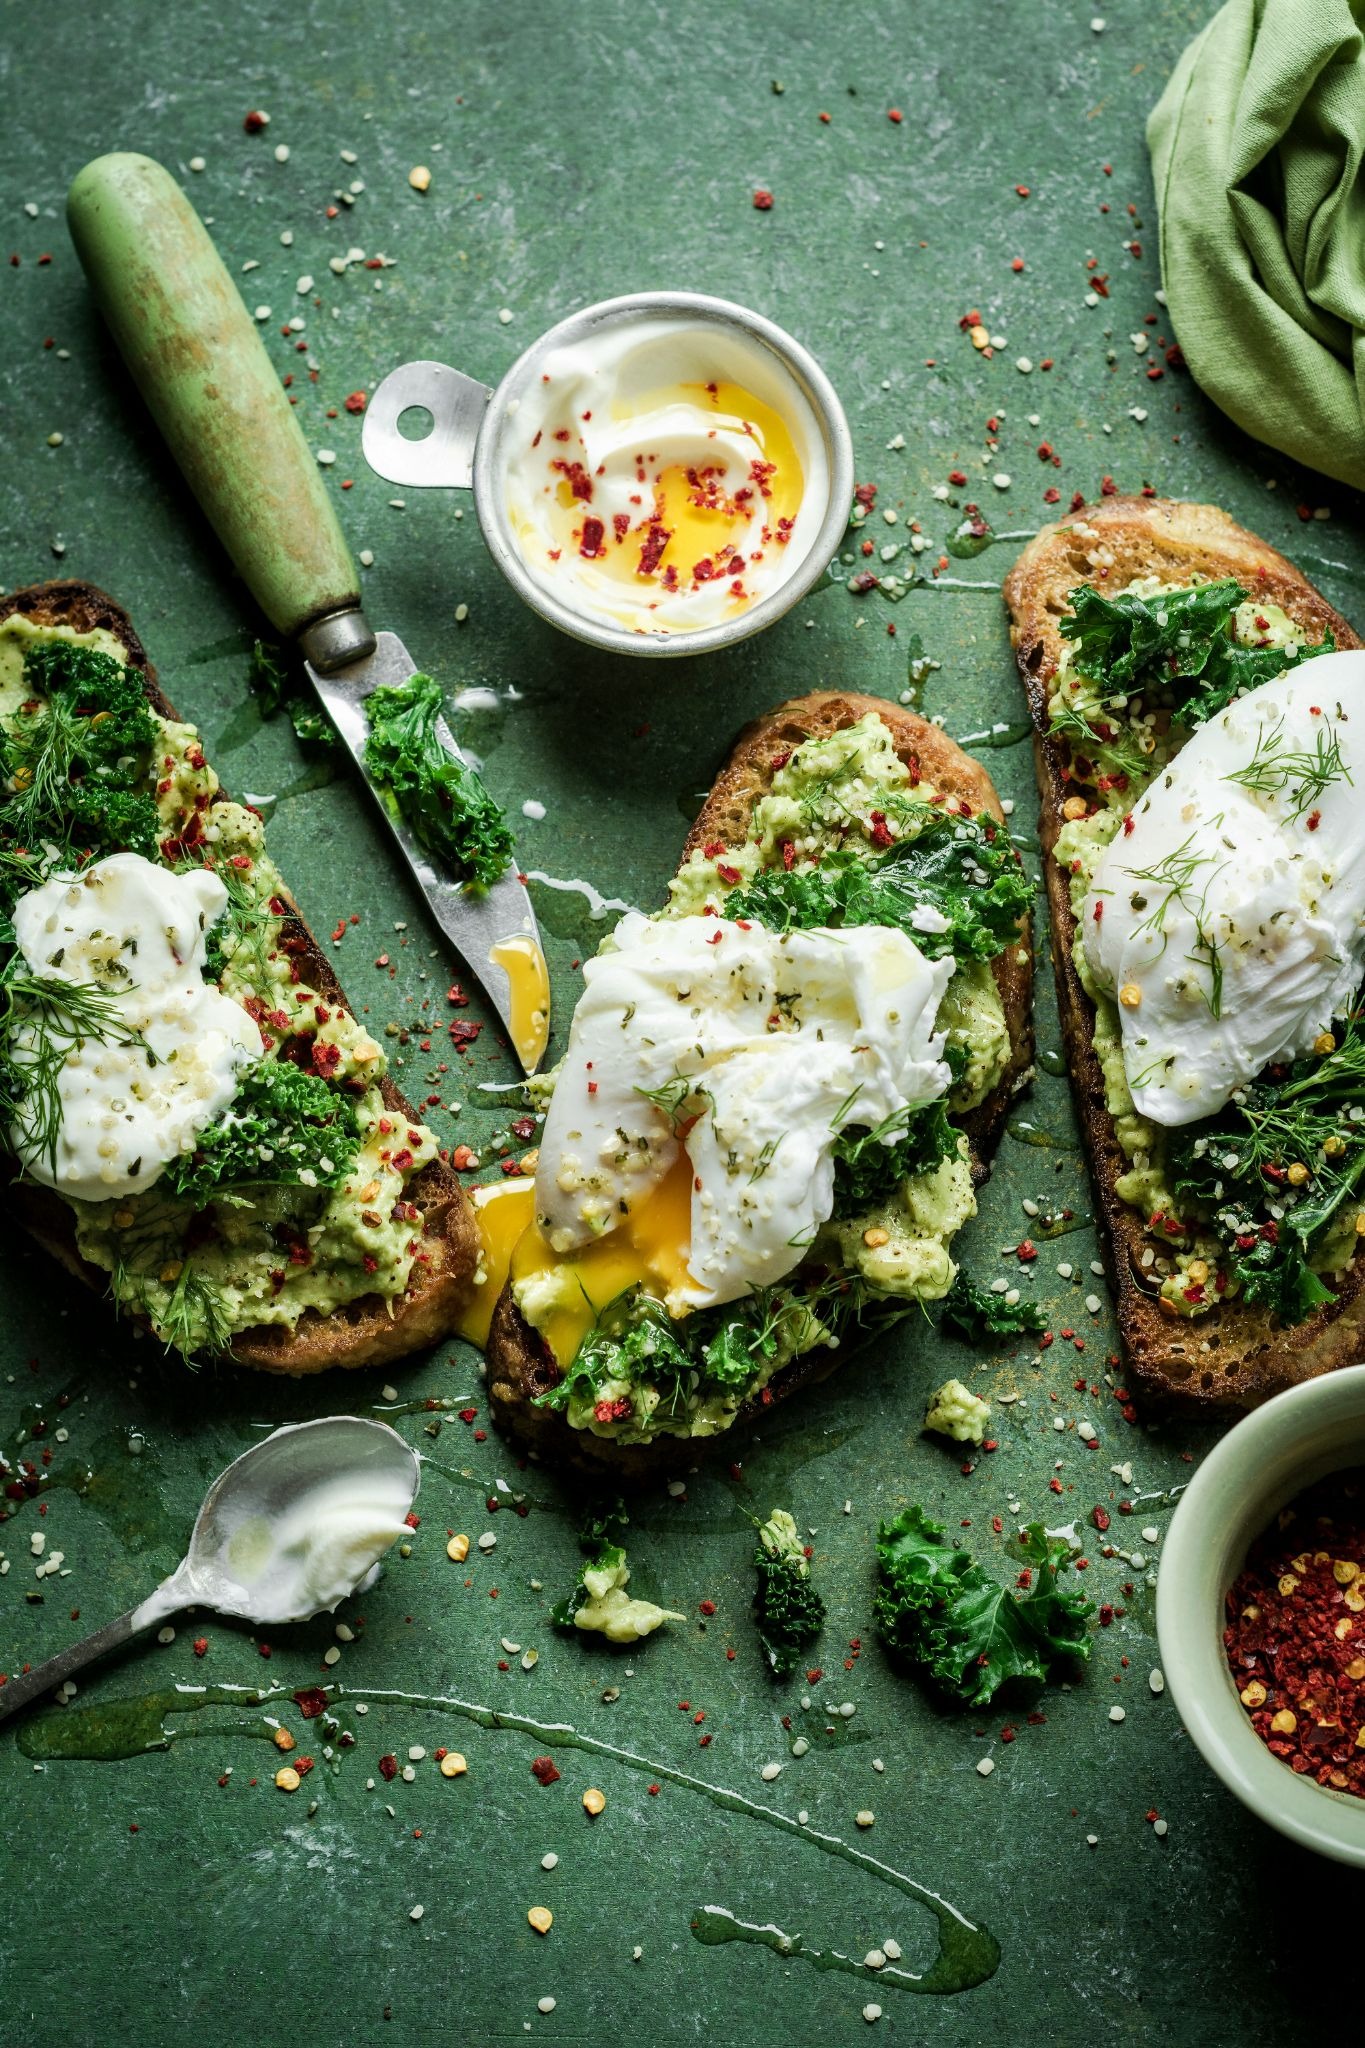
Food flat lays thrive on abundance and texture. Think scattered herbs, dusted flour, drizzled sauces, and half-eaten dishes. The “messy” flat lay is a genre of its own, and it works because it suggests a real moment rather than a staged scene.
Use plates of varying sizes, cooking utensils, raw ingredients, and napkins to build layers. A dark background (slate, dark wood) with warm tones in the food creates a rich, editorial feel.
Product and E-Commerce
Per fotografia di prodotto, flat lays are a go-to format because they allow you to showcase multiple items or details in a single frame. Keep arrangements clean and consistent, especially if you are building a grid for an online store.
For hero product shots, negative space is your best friend. For lifestyle-styled product shots, surrounding props should reinforce the brand’s identity without cluttering the scene.
Fashion and Accessories
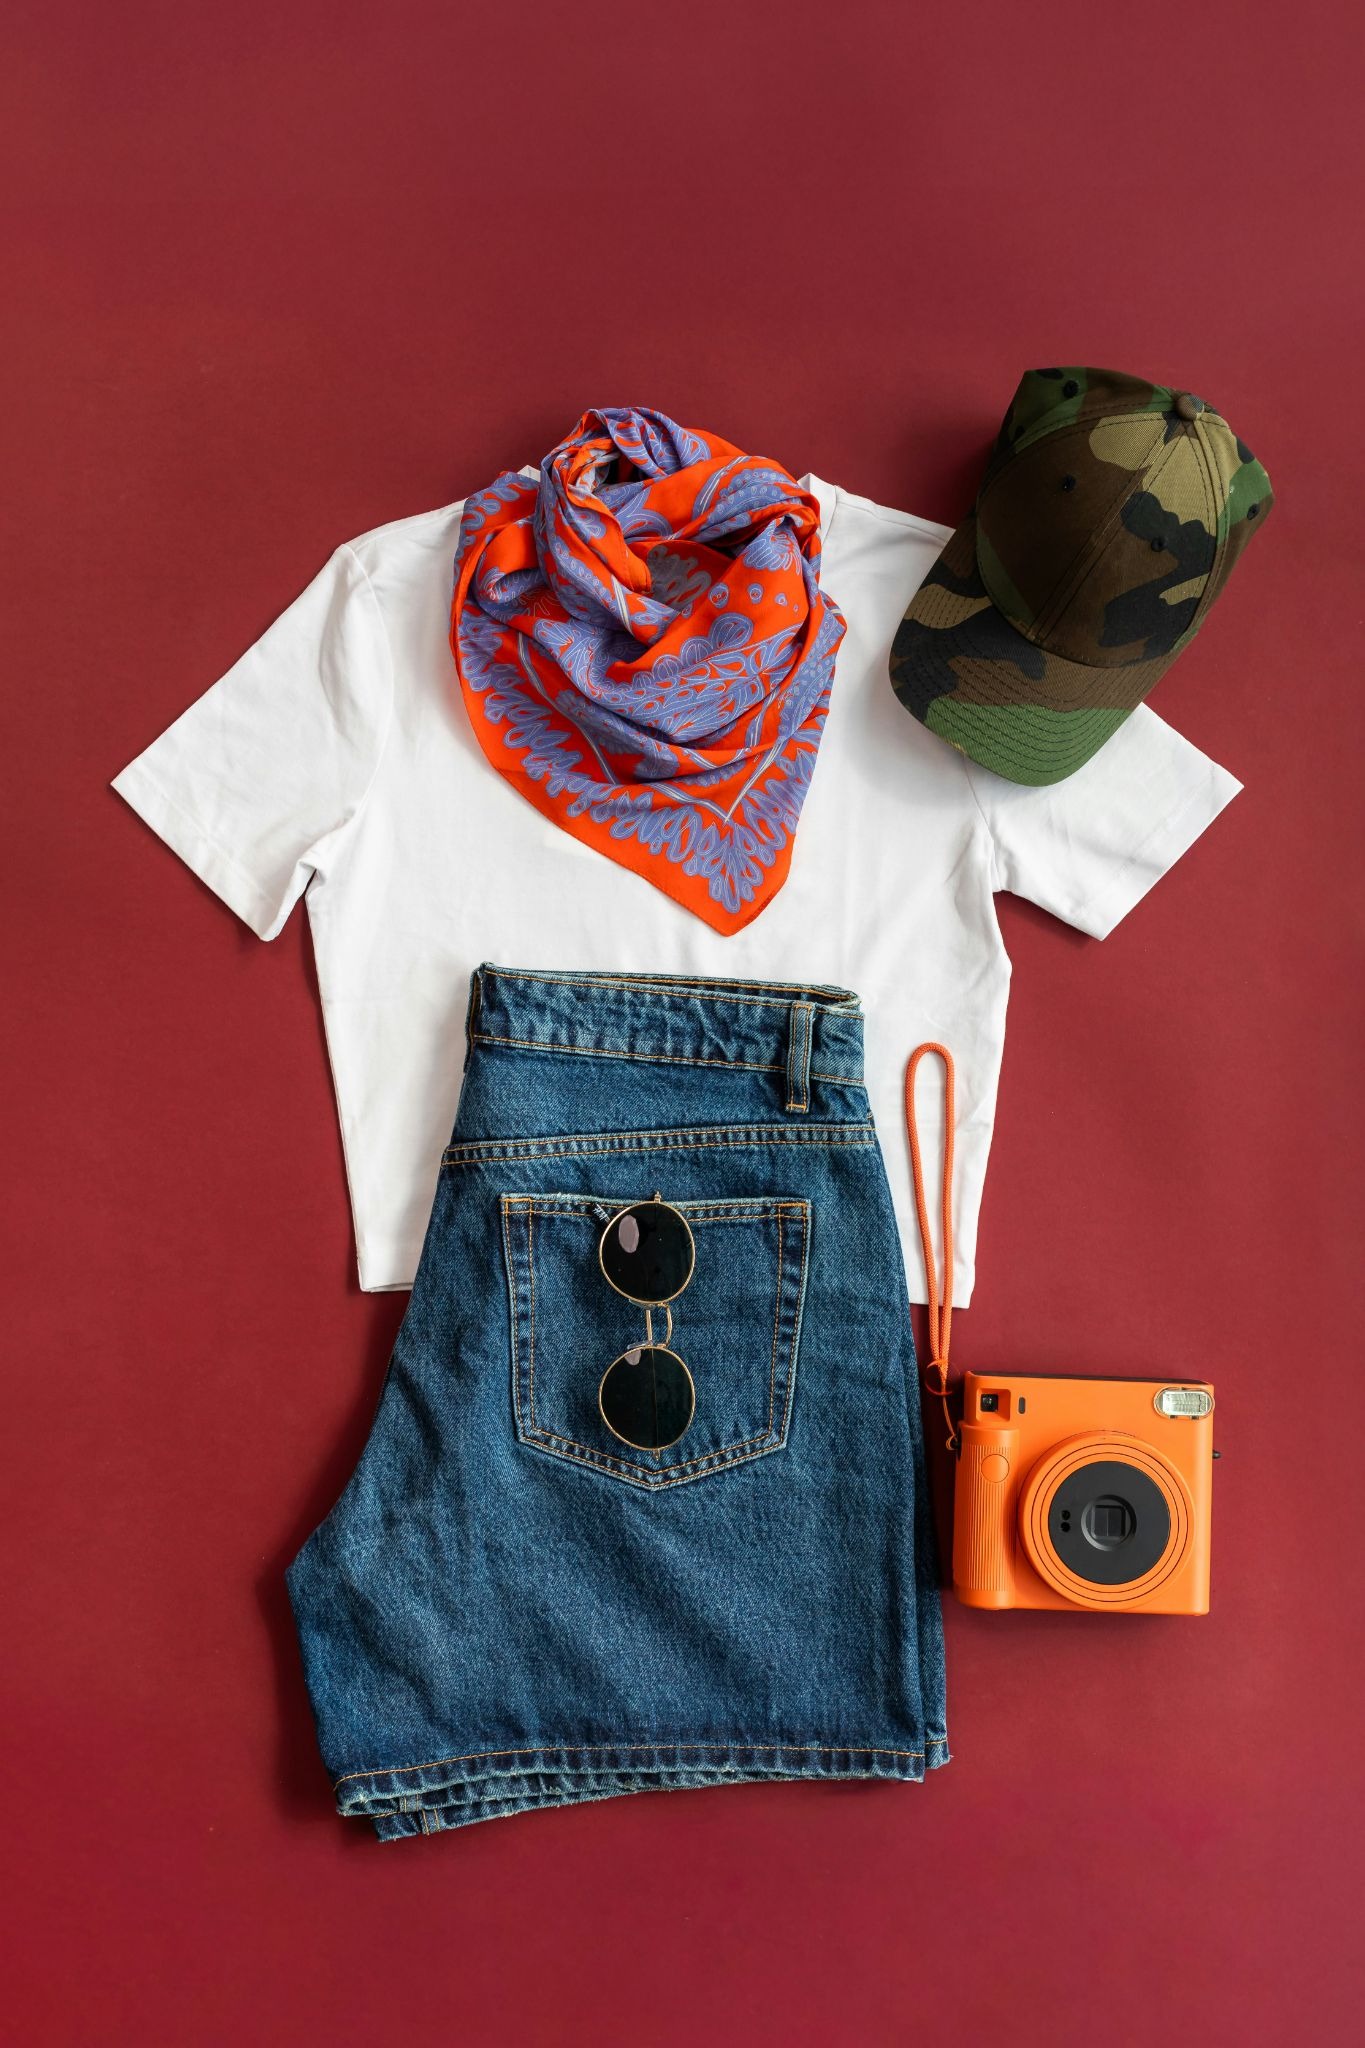
Clothing flat lays require extra care with wrinkles, folds, and symmetry. Steam or iron garments before shooting. Use tissue paper inside sleeves or pant legs to give them natural shape.
Accessories like watches, sunglasses, bags, and jewelry work especially well in flat lay format because they are naturally flat or compact.
Lifestyle and Social Media
Lifestyle flat lays are the most personal and creative category. A desk setup, a travel packing layout, a skincare routine, a morning reading scene. The goal is to communicate identity and taste through curated objects.
For social media content, keep in mind how the image will appear in a grid. Consistent lighting, backgrounds, and color palettes across multiple flat lays create a cohesive visual feed.

Fotografia di matrimonio
Many wedding photographers bring one or more small flexible surfaces in their gear for the day; a neutral surface that is slightly larger than a placemat and can roll into a sturdy tube canister will remain wrinkle-free. Use your questionnaire to gather info on items with special meaning or details that are important to their day.
Have the wedding couple set aside a full set of the invitations in advance, and determine a time with them or their wedding planner to borrow the rings and any other important items, such as the “something blue” or a set of engraved cuff links. Borrowing a boutonniere or a few spare blooms from the florist will add meaningful texture.
Editing and Post-Processing
Flat lay editing should enhance, not transform. Start with these adjustments:
- Crop and straighten. Correct any slight rotation so edges and objects are perfectly aligned.
- White balance. Ensure your whites are neutral, especially if you are shooting on a white background.
- Contrast and clarity. A subtle boost adds definition to textures and makes objects pop.
- Shadow and highlight recovery. Pull back blown highlights and open up shadows to reveal detail.
- Spot cleanup. Remove dust, crumbs, or small imperfections with a healing tool.
Shoot in RAW format whenever possible; it is one of the best ways to avoid occasional exposure issues like blown highlights or overly dark shadows. It gives you far more flexibility in post-processing than JPEG, especially for color correction and exposure adjustments.
Showcasing Your Flat Lay Work
Flat lay photography is inherently portfolio-friendly. The controlled format, consistent framing, and visual cohesion make flat lay series ideal for presenting as a collection on your portafoglio online.
When curating flat lay work for your portfolio, group images by theme, color story, or client project rather than mixing them randomly into your broader gallery. A dedicated still life or product section shows potential clients that you approach this format with intention and range.
Format’s portfolio themes are designed to let the visuals lead, which works especially well for the graphic, composition-driven nature of flat lay photography.
Your flat lay series deserves a home that lets the visuals lead. Inizia la tua prova gratuita and build a portfolio that frames your work the way you shot it.
Common Flat Lay Mistakes to Avoid
Overcrowding the frame. More props do not mean a better image. If the frame feels busy, remove objects until it feels right.
Inconsistent lighting. Mixing natural light with overhead room lights creates color casts and competing shadow directions. Stick to one light source.
No clear focal point. If the viewer’s eye does not know where to land, the composition is not working. Every flat lay needs a hero.
Ignoring the edges. Objects half-in, half-out of frame should look intentional, not accidental. Either include them fully or crop them deliberately.
Shooting at an angle. A flat lay shot at anything other than 90 degrees is not a flat lay. Even 80 degrees introduces visible perspective distortion.
Forgetting the story. A flat lay without a narrative thread is just a pile of objects on a table. Start with the mood, and let the styling follow.
Domande frequenti
What equipment do I need for flat lay photography? At minimum, a camera or smartphone, a flat surface, and a window for natural light. A tripod with a horizontal arm, a white foam board reflector, and a remote shutter trigger will significantly improve consistency and sharpness.
Can I shoot flat lays with a phone? Yes. Modern smartphone cameras are more than capable of producing high-quality flat lays, especially for social media. Use the grid overlay to keep your angle level and shoot in bright, indirect natural light.
What is the best background for flat lay photography? There is no single best background. Choose a surface that matches the mood of your image. White marble reads as modern and premium. Wood reads as warm and organic. Experiment with materials you already have before investing in purpose-built surfaces.
How do I avoid shadows in flat lay photography? You do not want to eliminate shadows entirely, as they add dimension. To soften harsh shadows, diffuse your light source and use a reflector on the opposite side. For shadowless product shots, use two matched light sources positioned at equal angles.
How do I make my flat lays look less staged? Introduce small imperfections. A slightly angled fork, a splash of coffee outside the cup, a crumpled napkin. Controlled imperfection suggests a real moment rather than a forced arrangement.
From the first overhead frame to a finished, client-ready collection, Format gives your craft the presentation it deserves. Start your free trial today.