


Product photography rewards preparation more than almost any other photographic discipline. Unlike street photography or portraiture, where spontaneity plays a central role, product work is built on control. Control of light, of background, of angle, of color. Get the setup right and every session becomes faster, more consistent, and more creatively freeing.
Whether you are building a product photography practice from scratch or refining an existing workflow, the fundamentals stay the same. You need a reliable camera and support system, intentional lighting, a clean background, and a repeatable process. This guide walks through each of those elements in detail, with practical recommendations you can act on today.
Essential Product Photography Equipment
You do not need a room full of gear to produce strong product images. But the right foundation makes everything else easier.
Macchina fotografica
A DSLR or mirrorless camera with manual controls is the standard for professional product photography. Full manual mode gives you precise control over exposure, which matters when you are matching shots across dozens of products. Entry-level bodies from Canon, Nikon, Sony, or Fujifilm will handle most product work well.
That said, recent smartphones can produce surprisingly sharp images for smaller products, especially in well-lit conditions. If you are testing the waters before investing, start with what you have and assess the results honestly.
Lenti
Your lens choice has more impact on final image quality than the camera body itself. Two options cover most product photography scenarios:
- A 50mm f/1.8 prime: Affordable, sharp, and versatile. Great for medium-sized products on a tabletop setup.
- A 24-70mm f/2.8 zoom: More flexibility for different product sizes and compositions. A stronger investment, but one that pays for itself quickly.
For small or detailed items like jewelry, cosmetics, or electronics, a dedicated macro lens (90mm or 100mm) lets you capture fine textures and surface detail that standard lenses can’t capture close-up. Avoid losing quality and wasting time during post-processing from cropping your images in an attempt to show small details at a larger scale.
Treppiede
A tripod is non-negotiable for product photography. It keeps your framing consistent across an entire shoot, eliminates camera shake at slower shutter speeds, and frees your hands for adjusting the product and reflectors.
Look for a tripod that can adjust to low angles and shoot overhead. The ability to point the camera straight down is essential for flat-lay compositions. You do not need to spend a fortune; stability and adjustability matter more than brand name.
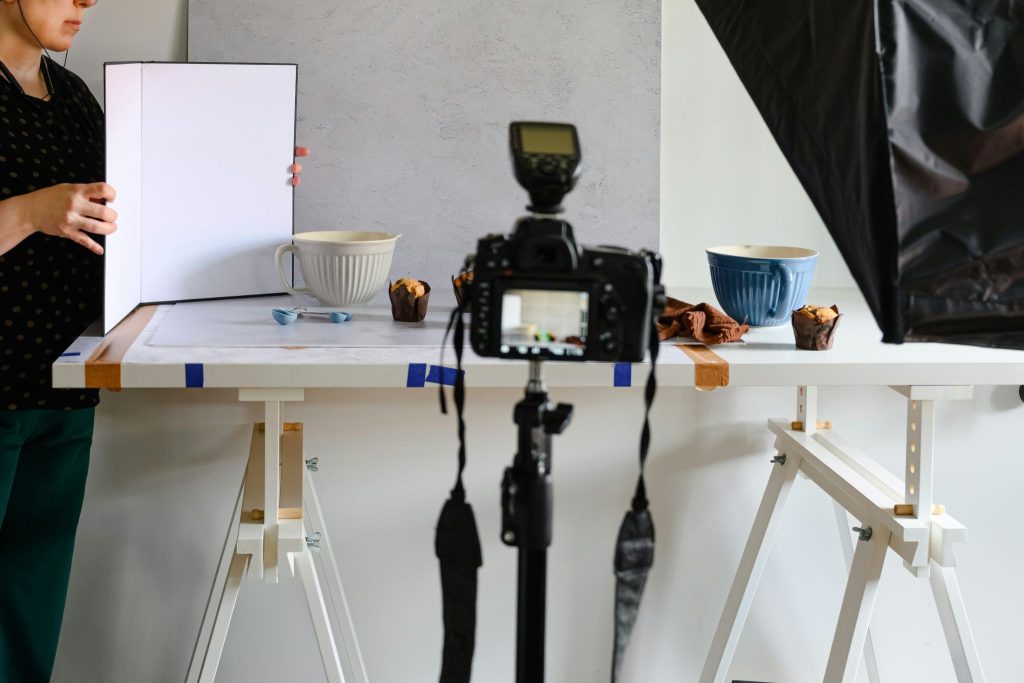
Reflectors and Diffusers
These are your most cost-effective light modifiers:
- White foam board or reflector cards bounce light back into shadow areas, filling in the darker side of your product without adding a second light source.
- Black foam board does the opposite: it absorbs light to deepen shadows and add contrast. This is especially useful when shooting white products on a white background.
- Diffusion panels or sheets soften harsh light from any source, whether a window or a strobe. Position them between the light and the product to reduce hard-edged shadows and hotspots.
Shooting Table
A folding table wide enough to accommodate your products with room for bounce cards on either side works perfectly. The table itself will not appear in your shots, so prioritize stability and size over aesthetics. Cover it with your background material and let it curve upward against a wall or stand to create a seamless sweep.
Lighting Your Product Photography Setup
Lighting is the single most important variable in product photography. It determines the mood, the clarity, and the accuracy of every image. There are three main approaches, each with distinct strengths.
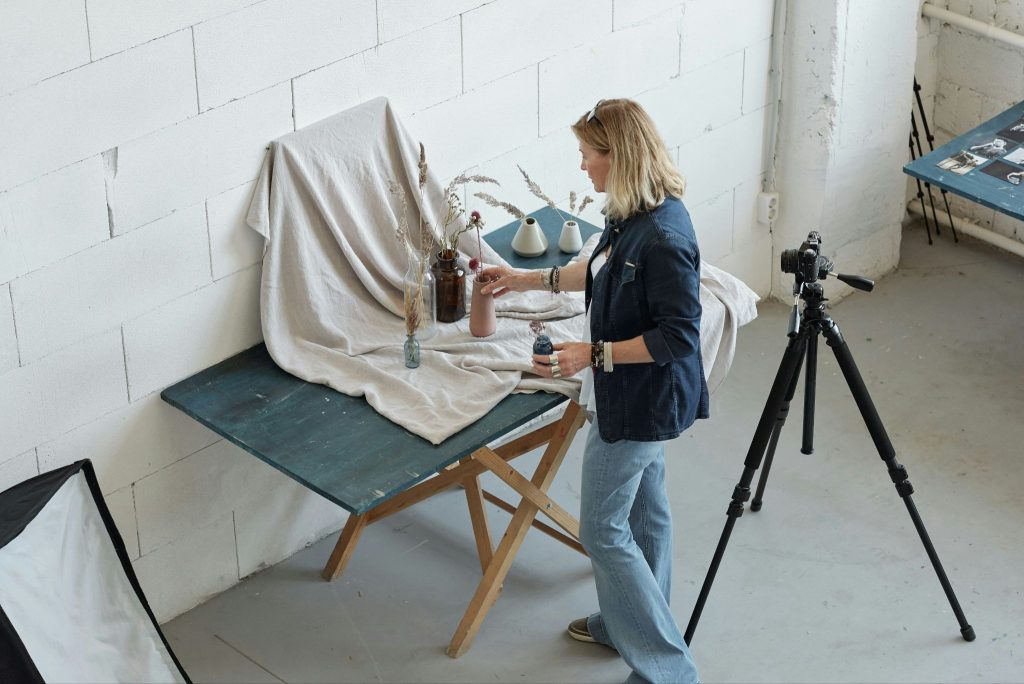
Luce naturale
Window light is the simplest starting point and produces beautiful, soft results. Position your table next to a large window and use the indirect daylight as your key light. The closer the product is to the window, the softer the light. Place a white reflector on the opposite side to bounce light into the shadows.
The advantage: zero cost, naturally flattering quality, and no technical setup. The limitation: you are at the mercy of the weather and the time of day. If you need to shoot for hours or maintain consistency across sessions, natural light alone can be unpredictable.
Key tip: Turn off all other lights in the room when shooting with window light. Mixing light sources with different color temperatures creates color casts that are difficult to correct in post.
Continuous Light
Continuous lights (LED panels or fluorescent softbox kits) stay on the entire time, so you see exactly what the camera will capture. This makes them intuitive for beginners and useful for video as well.
Look for daylight-balanced LED panels (5500K-5600K) with adjustable brightness. A two-light kit with softboxes positioned at roughly 45-degree angles to the product provides even, professional illumination for most setups.
The tradeoff: continuous lights are generally less powerful than strobes, which means you may need to use slightly higher ISOs or slower shutter speeds.
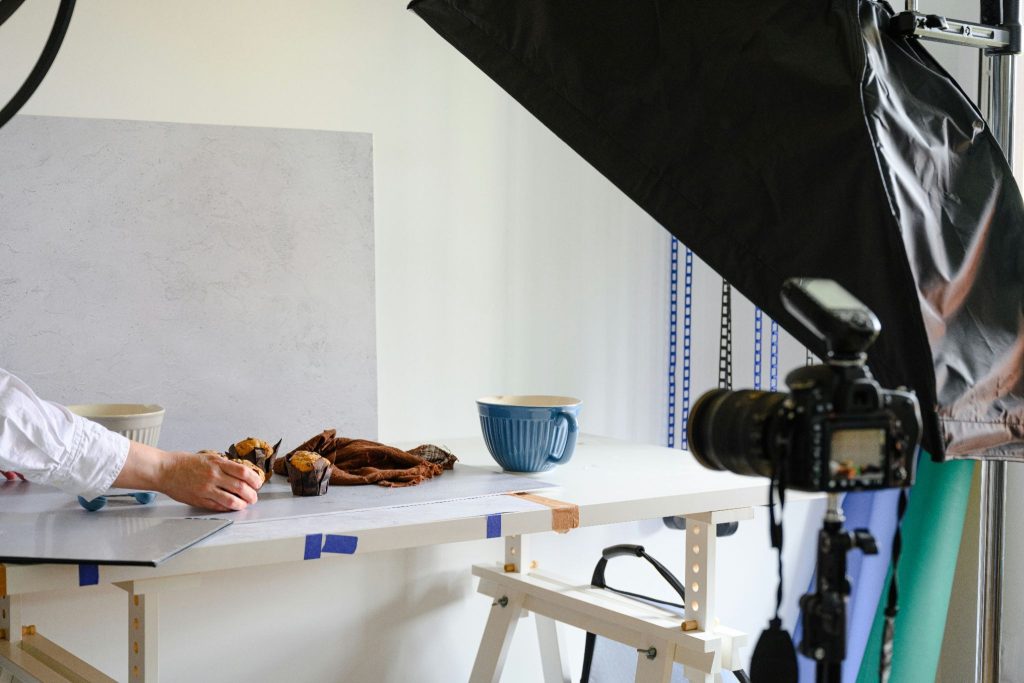
Flash and Strobe
Speedlights and studio strobes offer the most power and control. A single flash with a softbox or umbrella modifier can produce crisp, clean images with a very low ISO for maximum detail. For more complex products, a two- or three-light setup lets you separately control the key light, fill, and backlight.
Flash does add complexity. You will need to understand sync speed, flash power ratios, and triggering systems. But for professional product photography, strobes deliver the consistency and power that natural and continuous lighting cannot always match.
Choosing Your Lighting Approach
| Luce naturale | Continuous Light | Flash / Strobe | |
|---|---|---|---|
| Cost | Gratuito | Moderate ($100-$400) | Higher ($200-$800+) |
| Ease of use | Semplice | Intuitive | Steeper learning curve |
| Coerenza | Variable (weather, time) | High | Very high |
| Power | Depends on conditions | Moderate | High |
| Best for | Small products, lifestyle shots | Beginners, video+photo | Professional volume work |
Most photographers eventually move toward a flash-based setup as their volume and standards increase, but natural and continuous light remain perfectly valid for many use cases. Start with what makes sense for your current work and upgrade as you identify specific limitations.
For a deeper look at how different lighting techniques shape photographic results, our guide to lighting in photography covers the fundamentals.
Backgrounds and Surfaces
The background you choose has an outsized impact on how your product reads in the final image. The goal is to support the product, never compete with it.
White Seamless Paper
The standard for most commercial product photography. A white paper sweep curves from a vertical position to horizontal, creating a seamless, distraction-free background that makes the product appear to float. This is the default requirement for Amazon, Etsy, and most ecommerce platforms.
Paper sweeps are inexpensive and replaceable. When the paper gets scuffed or dirty, simply trim it and roll down fresh material.
Colored and Textured Backdrops
For editorial or branding work, a solid-color or textured backdrop can add visual personality to the shot. Matte surfaces work best since glossy materials tend to create unwanted reflections.
Neutral tones like gray, black, or warm beige are safe choices that complement most products. If you want something bolder, match the backdrop to the brand’s color palette.
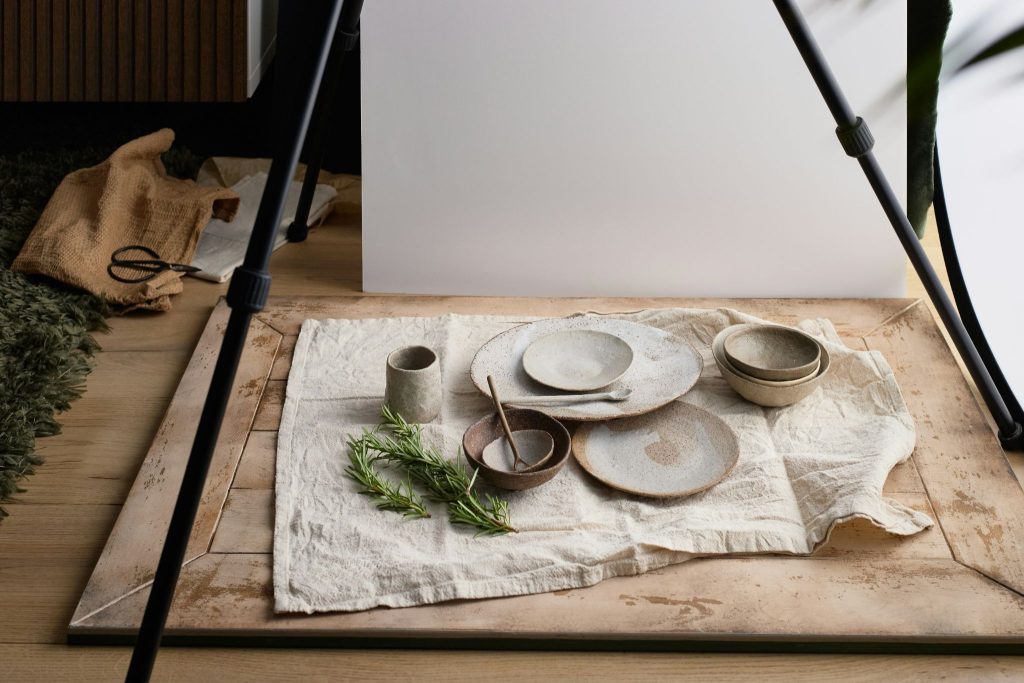
Lifestyle Backgrounds
Products shot in context (on a styled desk, in a kitchen, outdoors) communicate more than just appearance. They tell the viewer how and where the product fits into real life. This approach works especially well for food, home goods, and fashion items.
Lifestyle backgrounds introduce more variables (ambient light, color casts, clutter), so they demand more planning. Keep props minimal. A few carefully chosen elements that reinforce the product’s story are far more effective than a crowded scene.
For inspiration on creative approaches, explore these product photography ideas and examples from working professionals.
Setting Up Your Space Step by Step
Once you have your equipment gathered, building your actual shooting space is straightforward. Here is a simple, repeatable process.
1. Position Your Table and Background
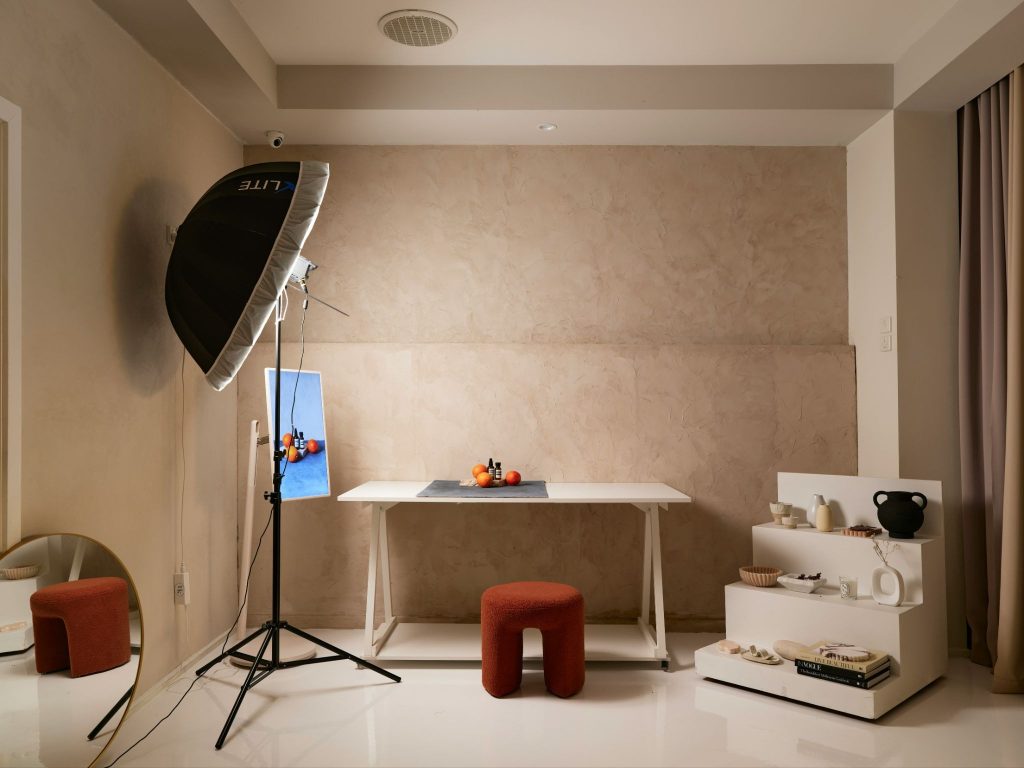
Place your table near your light source (a window for natural light, or where you plan to set your artificial lights). Tape your background paper to the wall behind the table and let it curve gently onto the surface. You want a smooth, crease-free transition with no sharp angle where the wall meets the table.
Mark your product position on the table with a small piece of tape. This keeps placement consistent across multiple products and makes it easy to reset.
2. Place Your Lights
For a single-light setup, position your key light at roughly 45 degrees to one side of the product. Place a white reflector on the opposite side to fill the shadows.
For a two-light setup, use the second light at a lower power as fill, positioned slightly behind or to the side of the product. This adds dimension and separates the product from the background.
3. Dial In Your Camera Settings
With your camera on a tripod, use these settings as a starting point:
- Shooting mode: Manual
- ISO: 100 (lowest native ISO for maximum clarity)
- Apertura: f/8 to f/11 (the sharpest range for most lenses, with enough depth of field to keep the full product in focus)
- Shutter speed: Adjust until the exposure looks right. On a tripod, slow shutter speeds are perfectly fine.
- White balance: Set manually using a gray card, or match to your light source. Auto white balance can shift between shots.
- File format: RAW. This gives you the most flexibility in post-production for adjusting exposure, white balance, and color.
Check your histogram after the first few shots. The white background should push close to the right edge without clipping, and the product itself should sit in the midtones.
4. Use Reflectors to Shape the Light
Even a single reflector changes the quality of your lighting dramatically. Angle a white card to bounce light into the shadow side of your product. Experiment with the distance and angle: closer produces a stronger fill, farther away keeps the shadows more defined.
If you are shooting a white product on white seamless, place a black card behind or to the side of the product to add edge definition and prevent the product from blending into the background.
Product Photography Tips for Stronger Results
Good equipment and lighting are only half the equation. These workflow practices separate efficient, professional shoots from frustrating ones.
Build a Shot List Before You Shoot
Before you pick up the camera, write down every shot you need: hero angle, 45-degree view, straight-on front, back detail, top-down, macro detail, and any lifestyle compositions. A shot list prevents missed angles and keeps the session focused.
Shoot Multiple Angles
Customers (or art directors) need to see a product from more than one perspective. At minimum, plan for:
- Eye level (front-on, the classic product shot)
- Three-quarter (shows depth and dimension)
- Top-down / flat lay (ideal for smaller items and curated compositions)
- Detail / macro (textures, finishes, labels, hardware)
Keep the camera and tripod in position and rotate the product rather than moving your entire setup. This maintains consistency in lighting and framing across the full set.
Keep Your Setup Consistent
Color consistency matters enormously for product photography, especially when shooting a range of items for the same brand or store. Shoot a gray card or color target at the start of each session so you have a reliable reference for white balance in post. Use the same backdrop, light positions, and camera settings for all products in a series.
Tether When You Can
If your camera supports tethered shooting, connect it to your laptop and view each image at full size in real time. Software like Adobe Lightroom or Capture One makes this straightforward. Tethering lets you spot focus issues, color shifts, and composition problems immediately, instead of discovering them hours later on your computer.
For more on how studio lighting setups affect your final product images, our studio lighting guide covers key and fill configurations in detail.
Building a product photography practice? Your portfolio should keep up. Explore Format free.
Post-Production Essentials
Even a well-executed shoot benefits from careful editing. The goal in product photography post-production is accuracy and consistency, not heavy stylization.
White Balance and Exposure
Start by correcting white balance using the gray card frame from the beginning of your session. Apply the corrected white balance across all images from that set. Adjust exposure so the product is properly lit and the white background is clean without clipping important detail.
Background Cleanup
If your white background is not perfectly pure, use the Whites or Levels slider to push it to true white. Be careful around the product edges to avoid halos. For more complex background work, Adobe Photoshop’s pen tool or masking tools give you precise control.
Color Accuracy
Compare your on-screen colors to the physical product. Use HSL adjustments to fine-tune specific hues if needed. Export in the sRGB color space for any images destined for web use, since this is the standard color space that browsers display consistently.
Export Settings
For web and ecommerce:
- Format: JPEG
- Color space: sRGB
- Resolution: Long edge 2000-3000px (check platform-specific requirements)
- Compression: Use a smart compression tool like JPEGmini or Photoshop’s “Save for Web” to reduce file size without visible quality loss for faster image loading
For portfolio and print:
- Format: TIFF or full-quality JPEG
- Color space: Adobe RGB or ProPhoto RGB
- Resolution: Full resolution from your camera
Batch Processing
One of the biggest efficiency gains in product photography comes from batch editing. Once you have dialed in the correct adjustments for one image, save those settings as a preset in Lightroom or a style in Capture One and apply them to the rest of the set. This ensures consistency and saves hours of repetitive editing.
Presenting Your Product Photography
Strong product photography does not just sell products; it builds your reputation as a photographer. If product work is part of your practice, how you present it matters.
Curate your best product images into a dedicated portfolio section. Show range: white-background shots alongside lifestyle work, macro details next to full-set compositions. A prospective client should be able to see your technical control e your creative sensibility in the same gallery.
If you are ready to build or update your portfolio, Format’s portfolio platform for photographers is designed specifically for visual work, with themes that let your product images speak without layout clutter getting in the way.
Give your product work the presentation it deserves. Start your free Format trial.
Domande frequenti
What is the best lighting for product photography? For most products, a single soft light source (a softbox or diffused window light) positioned at 45 degrees with a reflector on the opposite side produces clean, professional results. Flash and strobe setups offer the most power and consistency for higher-volume work.
Can I do product photography with a smartphone? Yes, modern smartphones can produce strong results for smaller products, especially in well-lit conditions. The key limitations are manual control (fewer exposure options) and lens quality for detail shots. Start with your phone if that is what you have, and upgrade when you hit specific limitations.
What background should I use for product photography? White seamless paper is the standard for ecommerce and catalog work. For editorial or brand photography, experiment with colored, textured, or lifestyle backgrounds that complement the product without distracting from it.
How do I avoid reflections on shiny products? Use a large, soft light source positioned at an angle, and place white cards around the product to create clean, even reflections. A circular polarizing filter on your lens can also reduce glare on glossy surfaces. For highly reflective items like glass or polished metal, a light tent or careful flagging may be necessary.
What camera settings should I use for product photography? Start with ISO 100, aperture f/8 to f/11, and adjust shutter speed for correct exposure. Shoot in RAW for maximum editing flexibility, and set white balance manually or from a gray card.
Your work is ready. Is your portfolio? Start your free trial with Format.