What Is Rembrandt Lighting and How To Use It in Your Portrait Photography
Classic photography lighting techniques are called classic because they are visually impactful and have stood the test of time. One such technique, called Rembrandt Lighting, is a single lighting source method that delivers a dramatic effect without involving a complicated setup. It is an especially popular studio portrait photography type.
This article covers the benefits of using Rembrandt lighting, options for setting up lighting for this method, and best cases for using this type of setup.
What Is Rembrandt Lightning?
Rembrandt lighting takes its name after Rembrandt Harmenszoon van Rijn, a 17th-century Dutch painter who was known for using earthy tones and golden highlights to frame the faces of his portraiture subjects. What made his painting style distinct was focusing lighting on the subject’s face and adding detail around it, tapping into an innate human attraction to the face.
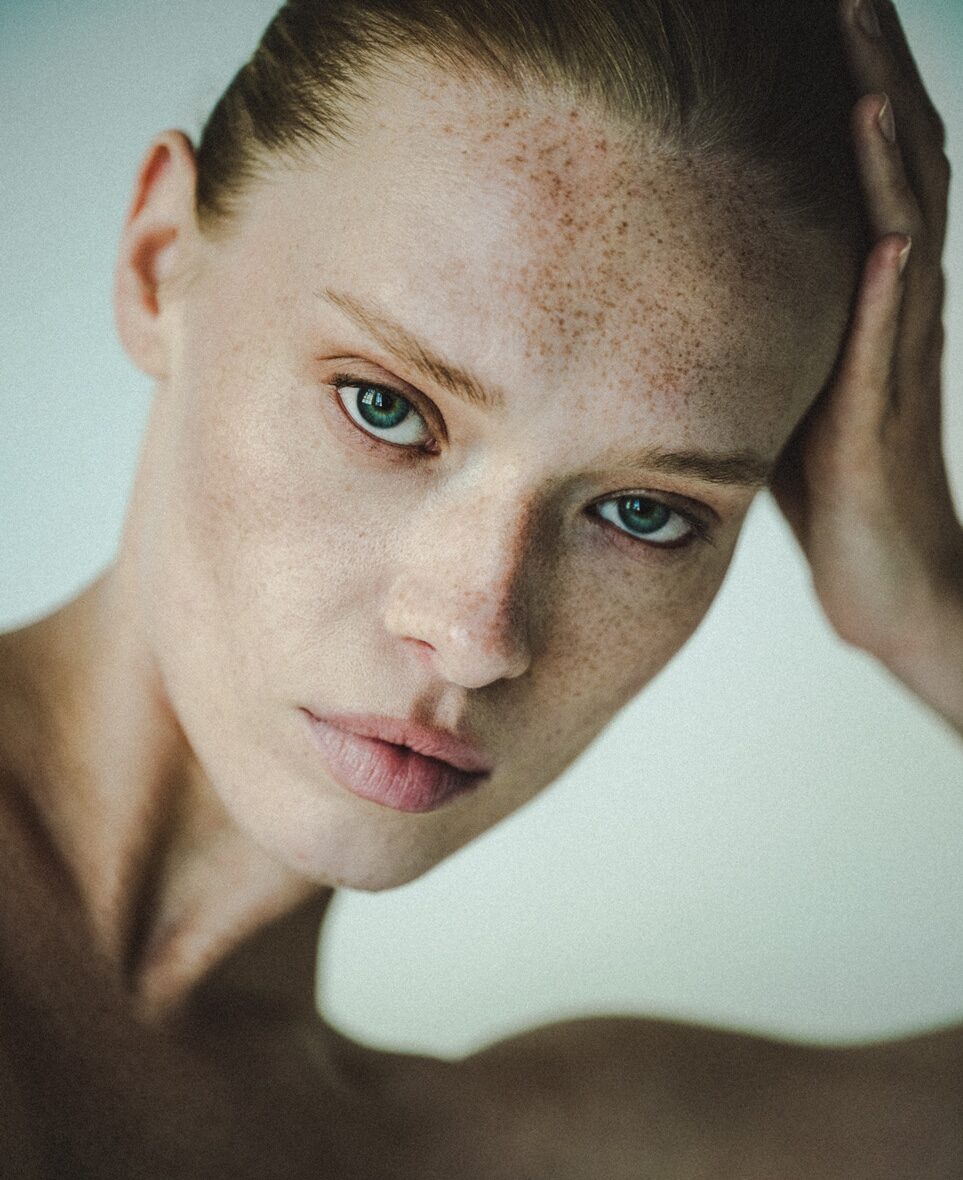
His approach results in one half of the subject’s face is fully illuminated, while the other half is in partial shadow. One tell-tale sign of Rembrandt lighting is the presence of a small inverted triangle of light below the subject’s eye, usually along the cheek, which is a result of the lighting setup. For perfect execution of this type of lighting, the triangle of light shadow must be no wider than the length of the eye, and no longer than the subject’s nose.
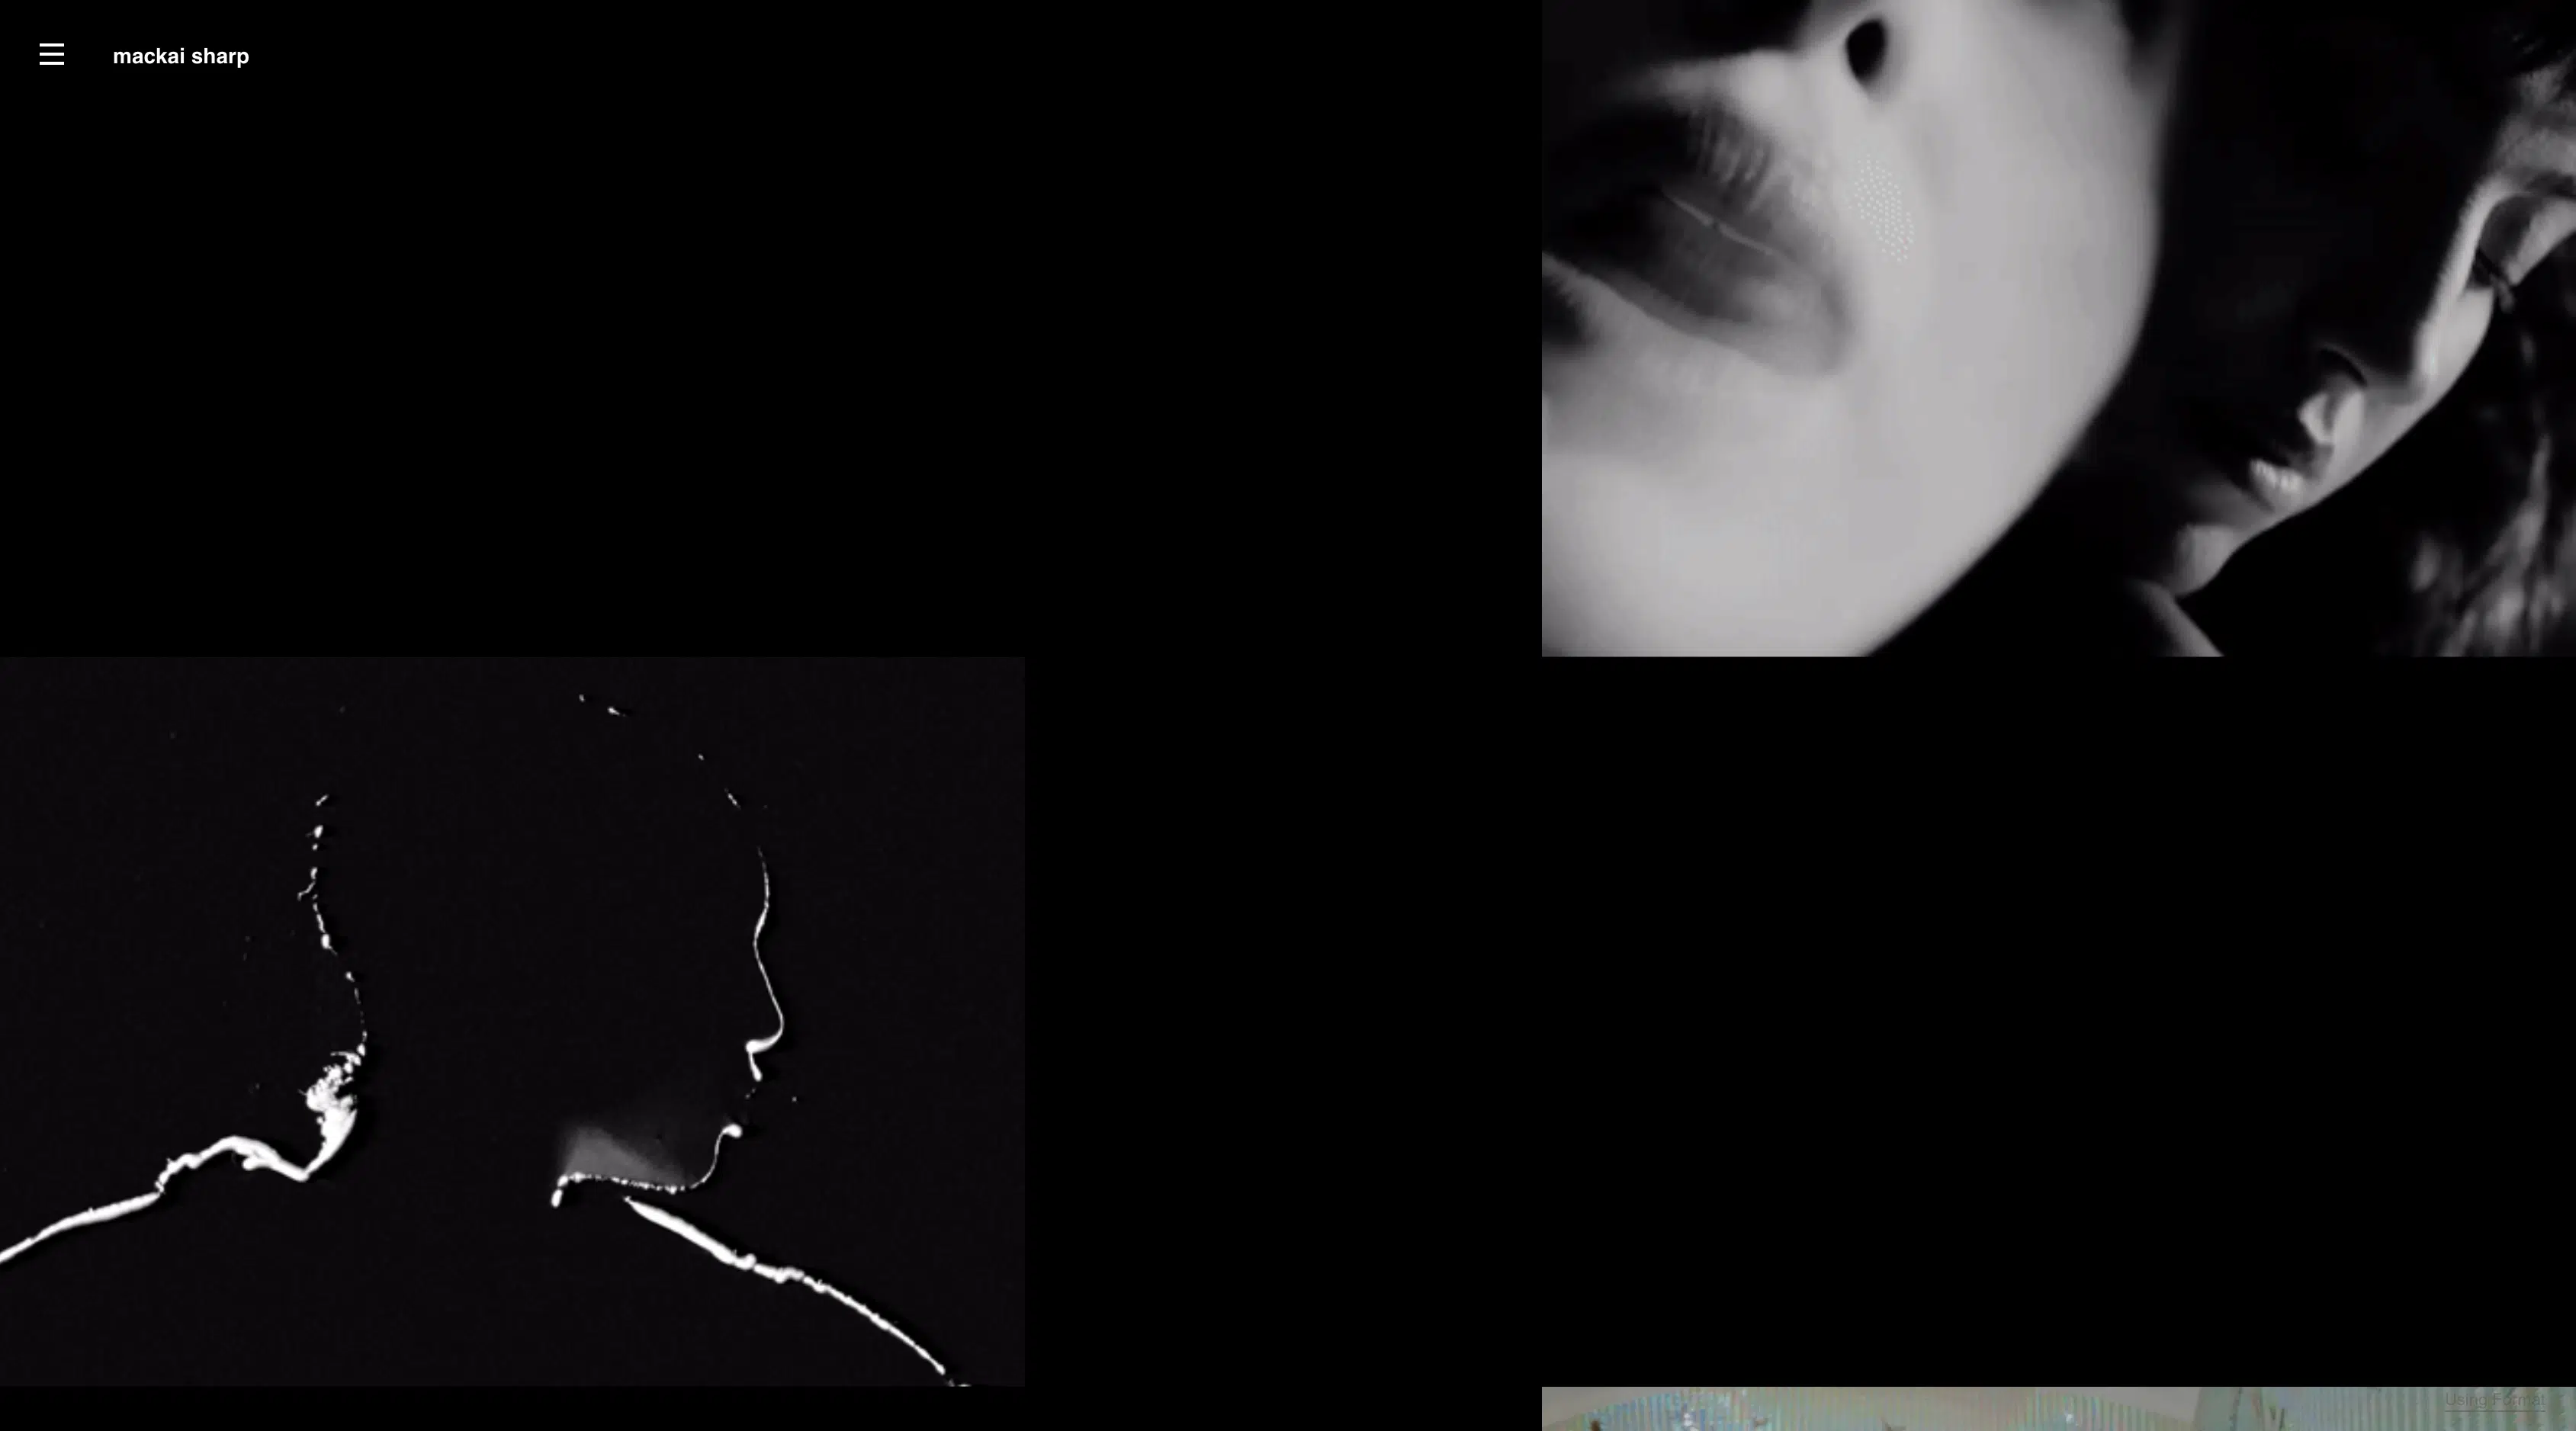
The Rembrandt lighting technique results in a moody and dramatic effect. This type of lighting technique often features a dark or black background behind the subject, putting the subject front and center.

Why Use Rembrandt Lighting?
Rembrandt lighting technique is considered one of the go-to photography lighting setups because it produces a dramatic visual effect without requiring a lot of setup. A more sophisticated version of this setup includes a reflector, which brings detail back into the shadows on the subject’s face, but even this setup requires minimal tools and associated costs. In this way, all renditions of the Rembrandt method are considered low-effort while producing high-impact photographs.
Secondly, one of the reasons professional photographers go with Rembrandt lighting is to achieve a dramatic visual effect called the chiaroscuro effect. Favored in types of still life, street, and landscape photography, the chiaroscuro effect is one with the presence of shadows on parts of the subject matter with sharp contracts of lighting in others. For portraiture, this often means that the shape of the sitter’s face defines light, and the dark side of the face is defined in silhouette against a lighter background.
When they come together, light and dark can create tension. One of the things that make the chiaroscuro effect—and in turn, Rembrandt lighting—sought after is its ability to create an atmosphere and single out the individual and their character in a captivating way.
Rembrandt Lighting Setup Options
This beginner-friendly lighting method takes some finessing but requires minimal equipment to set up. There are two approaches to Rembrandt lighting, one using a reflector and one using only a light source. For the single light method you will need:
indoor studio environment
off-camera light source with stand
optional: 32″ – 42″ reflector or split light sources
At its most basic, Rembrandt lighting consists of a single light source placed on a 45 degree offset from the subject, about 5 feet away. Positioned roughly two feet higher than eye level, the light source is angled slightly downward and hits the side of the face that is farthest away from the camera.
Another key consideration in executing this lighting technique is ensuring that your camera flash does not interfere with the key light. To avoid this, consider adjusting the power of your built-in camera flash, which is sometimes called the ‘flash compensation.’
While the setup itself is simple, taking a couple of test shots to get the balance of light and shadow right on the sitter’s face is recommended. This method is most suitable for a dramatic look with ample contrast.
If You’re Using a Reflector
If you want to achieve a softer and more natural lighting effect, you will need to supplement your shoot with a reflector. Begin by setting up the key light as instructed above. To use the reflector, place it at eye level, opposite of the key light at a 45-degree angle, 3-4 feet away from the model. The light from the reflector should be illuminating the model’s face.
If You’re Using a Fill Light
If using a fill light, its strength should be no more than half that of the key light. When shooting, photographers use less powerful lighting, called a fill light, to fill in the high-contrast shadows that the key light creates on a subject’s face. Leveraging 45-degree angles, fill lighting is placed opposite of the key light in order to supplement it. A fill light is a great way to bring out more detail in the model’s face or to lighten up the moody atmosphere that using a single light source can cast.
After learning about its setup, it’s not hard to tell why beginner photographers rely on Rembrandt lighting for producing striking shots without using expensive equipment.
Best Places To Use Rembrandt Lighting
Achieving the Rembrandt lighting method requires a controlled artificial lighting setup. As a result, this lighting style is best suited to being shot inside a studio. This is because outdoor environments can be unpredictable and let in too much natural light, making the contrast in light and dark harder to control.
If you own your own studio, it’s a good idea to place markers of the positioning of key elements (camera, model, reflector) and their angles in the studio so you can easily recreate the look as part of other projects. While the setup itself is simple, finessing the balance of light transfer between the key light and the reflector can be time-consuming, so marking down these key spots can help save you time the next time around.

6 Tips for Working with Rembrandt Lighting
When working with lighting setups, it helps to know the best ways to apply them. Here are some helpful tips for working with this type of portrait lighting.
1. Use a Spot Meter for Precise Control of Focus Point
Spot meters are a useful tool for working with harsh lighting with sharp contrasts. By using the spot meter function on your phone or camera, you control the focus point over the subject’s face. This means that the subject is captured in the light, while the rest of the shot is enveloped in shadow. This method is also helpful when you are shooting with a smartphone, allowing you to achieve the chiaroscuro effect in-camera.
In addition, using a spot meter is especially useful when capturing dramatic silhouette compositions. It helps capture the slivers of light while doing justice to the true black of the backdrop or background of the image.
2. Experiment With Multiple Light Sources
Rembrandt’s Baroque style of painting often depicted portraits whose features were lit up in ways that became the namesake for this lightning style. However, few people know that Rembrandt himself used multiple candles as fill lights when posting his subjects to create this look.
Similarly, you can introduce multiple light sources with the use of fill lights to produce different effects and ratios of negative space. You can also try using softboxes that produce diffused light to subtly brighten the facial features of the model.
3. Practice With Models or Yourself
Did you know Rembrandt’s most famous work, featuring a middle-aged man in a black beret looking directly at the viewer, is a self-portrait? Called Self-Portrait with Beret and Turned-Up Collar, this image is a classic example that practice makes perfect. Like the famous artist, you can hone your skills in this classic style of lighting by practicing capturing yourself or someone you know.
Note how the placement of the shadow on the subject’s face changes the aesthetic that is produced. This lighting effect has the ability to make a person look powerful or brooding, and learning its nuances can help you master all of its capabilities on set.
4. Practice Placing the Inverted Triangle of Light
Some Rembrandt lighting purists and professional photographers sweat the details when shooting with this method. According to them, not only should an inverted triangle shape be prominent below the subject’s eye on the side of the face that is prominently lit, it needs to adhere to other rations of the subject’s face proportionally. This means that the triangle of light should be no wider than the length of the eye directly above it, and no longer than the subject’s nose.
Photography is a deeply creative profession, and whether you choose to stick close to the conventions or experiment with them is entirely up to you. However, to master the traditional application of this lighting method, it helps to practice placing and sizing the inverted triangle on the subject’s cheek by manipulating the set lighting and body positioning of the model.
5. Shoot It Raw To Make the Most Of Lighting Contrast
Post-editing helps make images with contrast stand out even more. To help preserve maximum detail of your subject’s phase when using Rembrandt lighting, select the RAW format in your camera’s settings before beginning your shoot.
Then, use editing software like Photoshop and Lightroom to help bring out the subtleties in the image with detailed highlights. When editing for contrast, the choice before you is the retention of details and ensuring that the dark background pops around the silhouette.
6. Occasions and Models Suited to This Lighting Type
Every photographer knows that different types of lighting are best suited to specific compositions. The same can be said for casting. When it comes to Rembrandt lighting, this setup is particularly flattering for round faces because it helps add definition. It is also universally flattering for individuals with long faces and helps accentuate high or prominent cheekbones. However, this lighting effect may be challenging to achieve if the model has a small nose, or if the bridge of their nose is flat.
When it comes to optimal occasions and settings to use this lighting method, it offers versatile applications as long as the look the photographer is looking to achieve is a dramatic one. Rembrandt portraiture has a tendency to make the subject look powerful, which is why it’s heavily favored for professional photos for authors, actors, and public speakers. On the other hand, it can also make the model appear moody and brooding, which may or may not be the desired effect.
Overall, the Rembrandt lighting setup is both classic and versatile, making it a great fit for photographers of all specialties and experience levels.
Looking to do more with lighting? Check out some of our other pieces:
12 Types of Lighting in Photograph
Key Light Photography: A Beginner’s Guide
Silhouette Photography 101: Master The Basics