You have this amazing camera that can take beautiful pictures, but with so much terminology to learn and new skills to master, you’re not sure where to start. Sound familiar? Your camera sits in a corner collecting dust and you put off learning about photography… This is a common concern with many beginner photographers, but lucky for you, today we’re breaking down one of the most necessary photography skills you need to master—ISO.
If you’re not already familiar, ISO refers to the sensitivity of the camera’s sensor to light. It allows photographers to control exposure and capture images in low light. In addition, ISO provides flexibility and can be used creatively to showcase your best work. However, higher ISO settings can also introduce noise or grain in images, so photographers aim to use the lowest ISO setting possible for optimal image quality.
So it goes without saying, if you want your photos to look as professional as possible, this is a skill you’ll want to get the hang of ASAP.
We’ll chat about everything that you need to know about ISO from how it works, to choosing the right ISO for your needs. Sound good? Let’s get into it!
Defining camera ISO
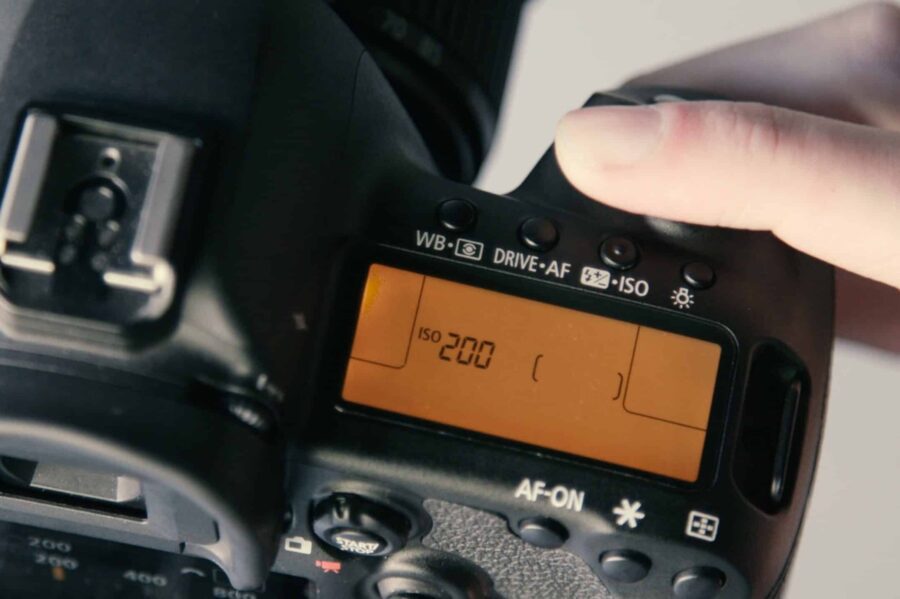
As mentioned, ISO refers to the sensitivity of the camera’s sensor to light. You can increase your ISO, aka make your camera more sensitive to light. Alternatively, you can decrease your ISO, or make your camera less sensitive to light.
To get a little more technical about where ISO comes from, the term “ISO” is derived from the term “International Organization for Standardization,” which is the governing body that sets standards for various industries, including photography. In the case of photography, ISO refers to the standardization of sensitivity levels for camera sensors. ISO is typically represented as a numerical value, such as ISO 100, ISO 400, ISO 800, etc., with higher numbers indicating higher sensitivity to light.
If you have ever heard of ASA as it relates to photography, the concept is similar but applies specifically to film photography. The terms can be interchangeable, but since the 1980s, the term ISO has come to replace ASA.
And so, for our purposes, we’ll be strictly using the term ISO to describe the camera’s sensitivity to light.
How ISO works
Understanding the mechanism of how ISO works can be very helpful when trying to learn photography, so let’s get a little more technical…
The relationship between ISO, aperture, and shutter speed
While it may be easier to learn about ISO on its own, unfortunately this isn’t possible. If you want to understand ISO, you have to understand it in relation to two other important photography concepts—aperture and shutter speed. Together, all three work to make up what is referred to as the “exposure triangle.”
Aperture refers to the size of the camera’s lens opening, which can be adjusted to control the amount of light that enters the camera. A smaller aperture results in less light entering the camera, while a larger aperture allows more light to enter. On the other hand, shutter speed determines the duration for which the camera’s sensor is exposed to light. A faster shutter speed lets in less light, while a slower shutter speed lets in more light.
As you can see, you need all three in order to achieve an optimally exposed image.
The effect of ISO on the exposure triangle
ISO plays a crucial role in the exposure triangle as it directly affects the camera’s sensitivity to light. A higher ISO allows for faster shutter speeds and/or smaller apertures to be used in low-light conditions, which can help freeze motion or achieve a larger depth of field, respectively. However, high ISO values also increase the likelihood of noise or grain in the image, which can degrade image quality.
High ISO vs. low ISO: benefits and drawbacks
There are many considerations to make when deciding on your ISO. To sum it up, high ISO values are beneficial for low-light conditions, allowing for faster shutter speeds and proper exposure. However, they can result in increased noise or grain, which may degrade image quality. Technology available in post-processing and in some new camera models can reduce this, but it is best to keep in mind that some extra grain is expected when shooting at high ISO’s.
In contrast, low ISO values are advantageous in well-lit conditions, producing cleaner images with little to no grain. Less grain can improve how sharp an image appears; an image with perfect focus on the subject at low ISO will almost always appear sharper than an image with perfect focus shot at a high ISO. Understanding the benefits and drawbacks of high and low ISO values is crucial for photographers to effectively balance exposure and image quality in different shooting conditions, and when deciding which best fits their artistic vision at a shoot.

Tips for choosing the right ISO
We’ve briefed you on the technical side, so now it’s time to get into the practical application of ISO.
Here are our best tips to get you started when thinking about ISO:
- First thing first, consider lighting conditions. In low-light conditions, higher ISO values may be necessary to achieve proper exposure. However, in well-lit conditions, lower ISO values can be used to minimize noise and maintain optimal image quality.
- Don’t forget to balance noise and image quality. Higher ISO values generally result in increased noise or grain in images, while lower ISO values produce cleaner images with better image quality. Consider the acceptable level of noise for the type of image you want to capture and adjust the ISO accordingly.
- The camera model and sensor size will also come into play. The performance of ISO can vary among camera models and sensor sizes. Generally, larger sensors and higher-end cameras tend to perform better at higher ISO values, producing less noise.
- You always need to be willing to test and adjust. Don’t be afraid to experiment with different ISO settings in various lighting conditions to determine the optimal ISO range for your camera and shooting preferences. This will help you achieve the desired balance between noise and image quality.
- There are also noise reduction techniques to keep in mind if you need to use higher ISO settings to capture images in low-light conditions. This will be done during post-processing.
- We haven’t chatted about the histogram yet, but when it comes to picking the best ISO, it is worth mentioning keeping an eye on the Histogram. This can provide valuable information about the exposure of your image. Avoid pushing the ISO too high if it results in clipping highlights or shadows in the histogram. This may result in loss of detail in the final image.
- Lastly, we highly encourage you to consider creative effects. For instance, in some cases, intentional use of higher ISO settings can result in creative effects, such as adding grain or creating a vintage look.
Common ISO scenarios and recommendations
Ensuring you feel comfortable choosing the right ISO in various conditions is critical to your success as a photographer.
With that in mind, we’ll give you our best ISO recommendation for three common lighting scenarios you might face.
1. Outdoors in bright daylight
For shooting in bright daylight, you typically want to use a low ISO to capture sharp and noise-free images. ISO 100-200 is recommended to maintain image quality and detail in bright outdoor conditions. This allows you to capture the scene with good dynamic range and accurate colors.
2. Indoor events with artificial lighting
When shooting indoors with artificial lighting, you may need to increase your ISO to capture enough light. A higher ISO, such as ISO 800-1600, can be a good starting point for indoor events. You can experiment with higher ISO settings based on the available light and the desired level of noise in your images. Keep in mind that higher ISO settings may introduce some noise, so finding the right balance between ISO and noise is important.
3. Low-light situations, such as night photography or concerts
In low-light situations, you may need to use even higher ISO settings to capture enough light. ISO 1600-3200 or higher can be used, depending on the available light and your camera’s low-light performance. Be mindful of the noise levels as higher ISO settings can result in increased noise in your images. Experiment with different ISO settings to find the optimal balance between capturing enough light and managing noise.
Remember, ISO is just one of the three factors (aperture, shutter speed, and ISO) that affect exposure in photography. Balancing these settings based on the lighting conditions and desired image outcome is essential to achieve the best results.
Mastering ISO in manual mode
So you want to have full control when you’re shooting? We don’t blame you!
This is where manual mode can come in handy because shooting in manual mode provides photographers with precise control over ISO, aperture, and shutter speed, allowing for accurate exposures. It also ensures consistency in exposure settings, resulting in a cohesive look throughout the shoot.
Keep in mind that manual mode also provides creative freedom, allowing photographers to experiment and achieve their desired artistic vision.
We’ve already provided you with some tips for fine-tuning ISO settings for specific situations:
(i.e., low-light situations, increase ISO; bright outdoor situations, lower ISO). We’ve also mentioned that you need to find the balance between desired brightness and noise in your image. This all remains true, but keep in mind that sometimes you might want to use your Manual Mode to play with the ISO to achieve a specific vision.
In other words, it’s not always as simple as choosing an ISO based on the lighting. Sometimes you need to think about your vision and go against conventional wisdom.
Techniques to achieve a specific artistic vision using ISO
- Intentional noise: Use higher ISO settings to intentionally add noise for a gritty or vintage aesthetic, adding character and mood to the photo.
- Long exposures: Experiment with different ISO settings for long exposures. Lower ISO values for longer exposures can capture smooth and flowing movements, while higher ISO values for shorter exposures can capture dynamic and dramatic scenes.
- Silhouettes: Adjust ISO for silhouettes to create a striking contrast between the subject and the background, resulting in visually impactful images.

Demystifying Auto ISO
Now, on the other hand, as much as some may love having control in manual mode, others may be all about the auto ISO. It provides a lot of benefits. Don’t worry, we’re not going to tell you to totally give up on Manual ISO, but there are some important considerations to make in that decision. So, first…
Understanding the purpose and function of auto ISO
Auto ISO is a feature found in many digital cameras that automatically adjusts the ISO setting based on the camera’s light meter reading. The purpose of Auto ISO is to simplify the process of exposure settings for photographers by automating the ISO adjustment based on the lighting conditions, allowing them to focus on other aspects of photography such as composition and framing.
And that’s not all! There are other benefits of using auto ISO.
Pros of auto ISO
- Auto ISO is convenient: It allows for quick and easy adjustments to the ISO setting without having to manually change it. This can make things easier in rapidly changing lighting conditions or fast-paced shooting situations.
- It provides exposure flexibility: This means you can achieve proper exposure in challenging lighting situations by automatically adjusting the ISO setting to maintain a balanced exposure, even when lighting conditions change rapidly.
- Auto ISO can reduce noise: It does this by automatically selecting the lowest possible ISO value based on the available light, resulting in cleaner images with less noise in well-lit conditions.
All great things, but there are some cons to consider.
Cons of auto ISO
- Giving up control: you may not always get the desired outcome or creative vision for the photo.
- Likely to encounter inconsistent results: This happens most often when shooting in rapidly changing lighting environments, or in situations where the background and subject have significant contrast. This is largely due to the camera’s metering system and algorithms, and will often lead to variability in exposure settings and image quality.
- More likely to result in an incorrect exposure: Overexposure or underexposure of images, as well as camera blur, are all possible when the camera’s metering system misreads the lighting conditions. It can be useful in some situations, but choose wisely; nothing can replace the expertise of a skilled photographer in a challenging lighting situation.
If you do decide that you want to use auto ISO, we’ve got some tips for you!
Tips for maximizing auto ISO performance
- Adjust the Auto ISO range to suit the shooting conditions and the camera’s performance. Avoid setting the ISO range too high, as it may result in excessive noise in images.
- Keep an eye on the camera’s metering and exposure compensation settings to ensure that the Auto ISO is providing the desired exposure results. Adjust exposure compensation as needed to fine-tune the exposure.
- Review images after shooting to evaluate the performance of Auto ISO in different lighting conditions and adjust as needed for future shoots.
Reducing noise in high ISO images
By now, we hope we’ve made it clear just how important it is to balance light. Remember, too high of an ISO in a low-light image will likely result in noise in the image, but too low of an ISO and your image won’t be properly lit. Again, it’s a balancing act.
One thing is for sure, though, unless you’re intentionally adding noise to your image as a creative detail, for the most part, noise is something you’ll always want to reduce as much as possible.
Here are some tips to get you started thinking about noise reduction.
The impact of noise reduction in-camera and in post-processing
Did you know that your camera can help you out with noise reduction?
In-camera noise reduction is applied automatically by the camera’s processing engine when shooting JPEG images. It can reduce noise, but it may also result in loss of fine details and image softening.
On the other hand, noise reduction in post-processing allows for more control and customization. It can be applied using dedicated noise reduction software or as a step in the post-processing workflow using software like Adobe Lightroom, Photoshop, or other third-party plugins.
Recommended software for noise reduction
There are several software options available for noise reduction, each with its strengths and weaknesses. Some popular choices include Adobe Lightroom and Photoshop, DxO PhotoLab, Topaz DeNoise, and Noiseless by Skylum. These software tools offer advanced noise reduction algorithms that can effectively reduce noise while preserving image details. They often provide options for selective noise reduction, allowing photographers to target specific areas of an image and adjust the strength of noise reduction to achieve the desired results.
Tips and techniques for minimizing noise while preserving image detail
- Try shooting at lower ISO settings, because, as you know, high ISO settings increase the noise in images. Just ensure you’re also considering the exposure of the image.
- We recommend you use noise reduction sparingly because it can result in a loss of image details and a plastic-like appearance. To avoid this, always zoom in to 100% to inspect the image for any loss of fine details.
- Experiment with image stacking. This is a technique where multiple images of the same scene are combined to reduce noise. By averaging the pixel values of multiple images, the noise is effectively reduced, while the image details are preserved.
- You can try to shoot in RAW. Remember, RAW files contain more image data compared to JPEG, allowing for more flexibility in post-processing, including noise reduction.
- You can also play with selective noise reduction. In this case, instead of applying noise reduction uniformly to the entire image, use selective noise reduction to target specific areas with higher noise levels, such as shadows or darker regions. This way, you can reduce noise only where it is needed while preserving details in other areas.
The future of ISO in camera technology
Camera technology is continuously being updated and improved, making photography even more approachable for the beginner. Having said that, if you want to take advantage of these advancements, you need to stay up to date with the technology so you know what to look for when purchasing a camera.
Let’s chat a bit more about the future of ISO.
Developments in sensor technology and noise reduction
Advancements in sensor technology and noise reduction are driving the future of ISO in camera technology. Sensors are becoming increasingly sensitive to light, allowing for higher ISO settings without sacrificing image quality. This enables photographers to capture better low-light and high-speed action shots with reduced noise, resulting in cleaner images.
Additionally, noise reduction algorithms are improving, leading to more effective in-camera noise reduction processing, which can result in improved image quality at higher ISO settings, making photography in challenging lighting conditions more versatile.
The importance of continued learning and adaptation in photography
Photographers need to stay updated with the latest advancements in camera technologies, understand the capabilities and limitations of their gear, and develop skills to optimize ISO settings for different shooting situations. This includes understanding the trade-offs between ISO, aperture, and shutter speed, as well as post-processing techniques to further reduce noise and enhance image quality. By continuously learning and adapting, photographers can make the most out of ISO and other camera settings to achieve optimal image quality in their photography endeavors.
How do you feel about your understanding of ISO?
At this point, we hope you’re feeling confident about your ISO capabilities. While you will have to spend time learning more about aperture and shutter speed as well, if you’re able to get a firm grip on ISO you’ll find that the other two prongs of the exposure triangle come together much more seamlessly.
And hey, if you’re still struggling to understand ISO, that’s totally okay! Here are some key takeaways to help you out.
Key ISO takeaways:
- ISO is a camera setting that determines the sensitivity of the camera’s sensor to light.
- Lower ISO values typically produce cleaner images with less noise. Higher ISO values, while they help the camera perform better in low-light situations, may introduce noise, which can manifest as grain or speckles in the image. Therefore, it’s important to balance the ISO value with other camera settings like aperture and shutter speed to achieve optimal image quality.
- Advancements in sensor technology and noise reduction algorithms are improving the performance of higher ISO settings, allowing for better low-light performance with reduced noise in newer camera models.
- ISO settings are typically adjusted based on the lighting conditions of the scene. Lower ISO settings (e.g., ISO 100-400) are ideal for well-lit environments, while higher ISO settings (e.g., ISO 800 and above) are better suited for low-light or indoor situations.
- Continuous learning and adaptation in photography, including understanding the capabilities and limitations of your camera’s ISO performance, can help you make informed decisions when setting ISO values to achieve the desired image quality for your specific shooting situation.
Keep practicing with your ISO
Even if you understand everything in this article, sometimes it really just takes getting out there and experimenting with ISO yourself in order to fully grasp it.
Are you ready to try?
There’s no better time than the present to start testing out ISO in all your photography endeavors.
You’ve got this.