You don’t have to shoot video to create images that move. All you need is a camera and an interesting setting. Photographer Katie Sadie proved this when we challenged her to create a DIY photo flip book using nothing but a disposable camera from Lomography. The color-saturated, analog result is a photo project that’s easy to replicate at home. Here’s how.
Step one: Pick your camera
For this flip book, we gave Sadie one of Lomography’s newest releases, the Simple Use Camera. It comes in their purple-tinged Lomochrome film, standard color negative, and also black and white. We went for the color film to add more interest and movement to the flip book. “Much like what you would expect with a disposable camera, some imperfections and unpredictable results are always welcome. That is part of the charm of a disposable,” Sadie says of Lomography’s Simple Use Camera.
A disposable camera would be a great choice for this project if you don’t have another film camera at hand. Lomography’s disposable also offers an unusual perk, which is that you can actually reuse it by switching out the film roll. “You have to wind the film all the way out of the canister before you start exposing so that it will be counting down the exposures until the roll is done,” Sadie says.
If you do often shoot on 35mm or 120mm, your analog camera of choice will also work well. A digital camera could definitely work, too—you’ll just need to get the photos printed, whether at a lab or at home.


Step two: Pick your subject matter
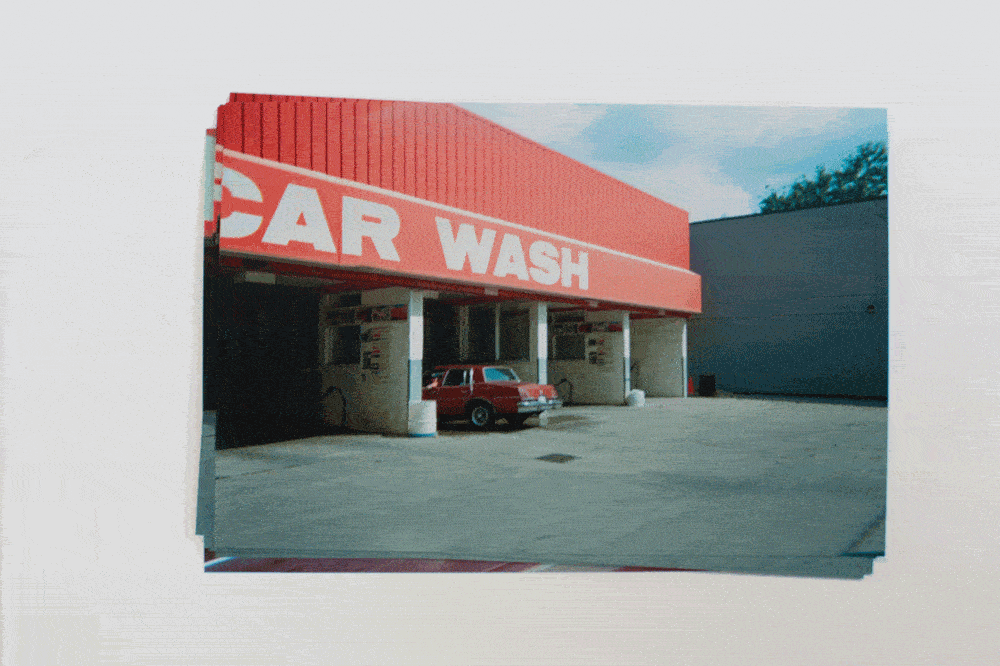
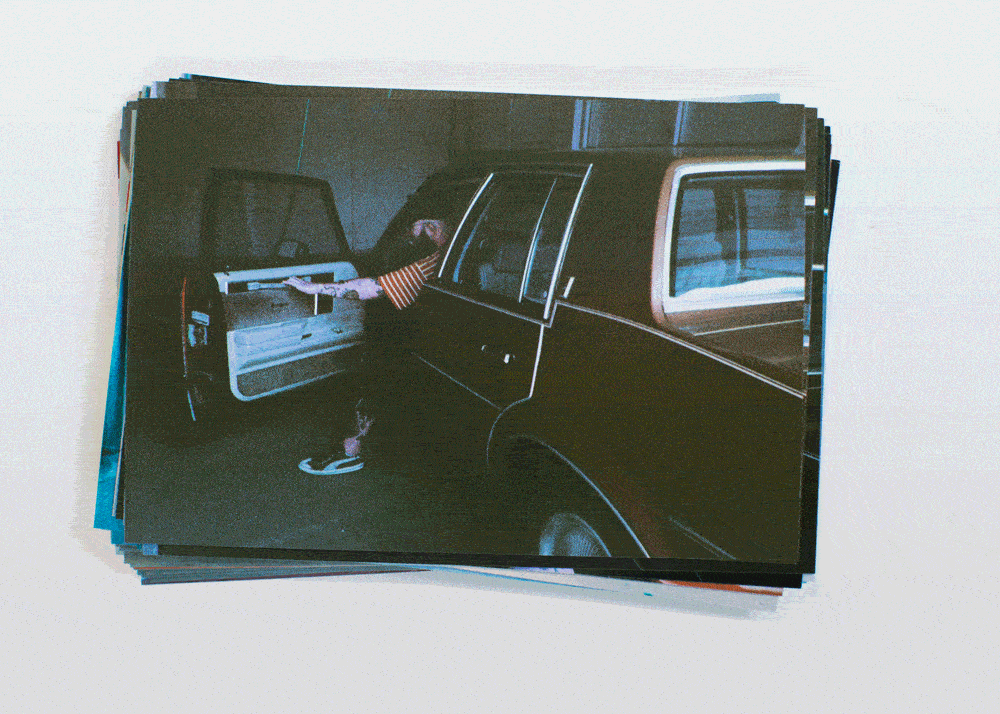
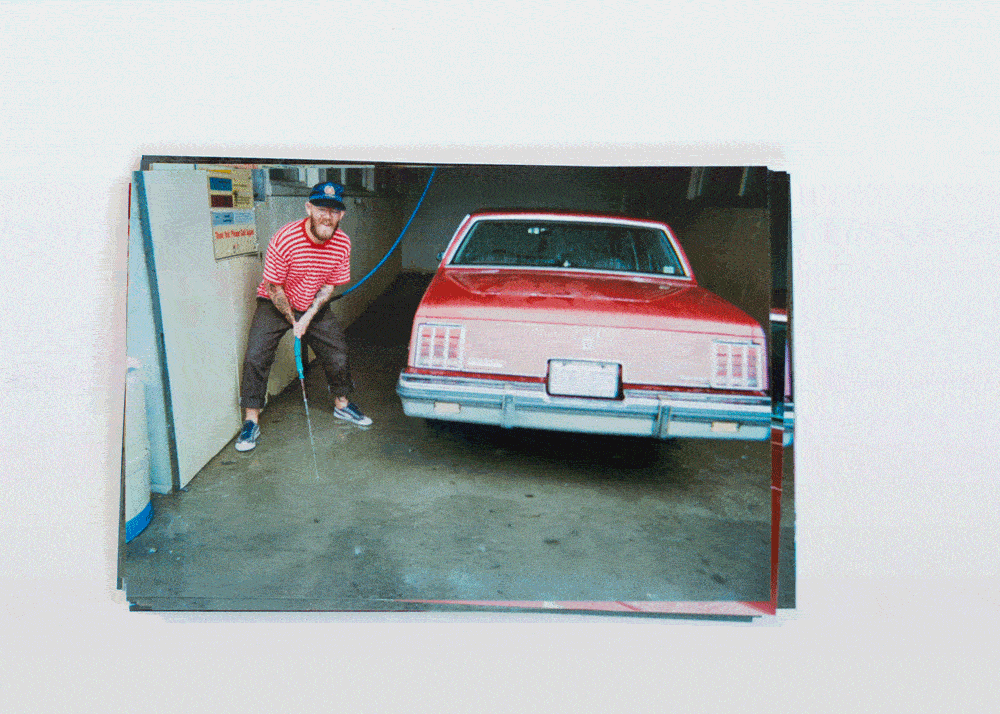
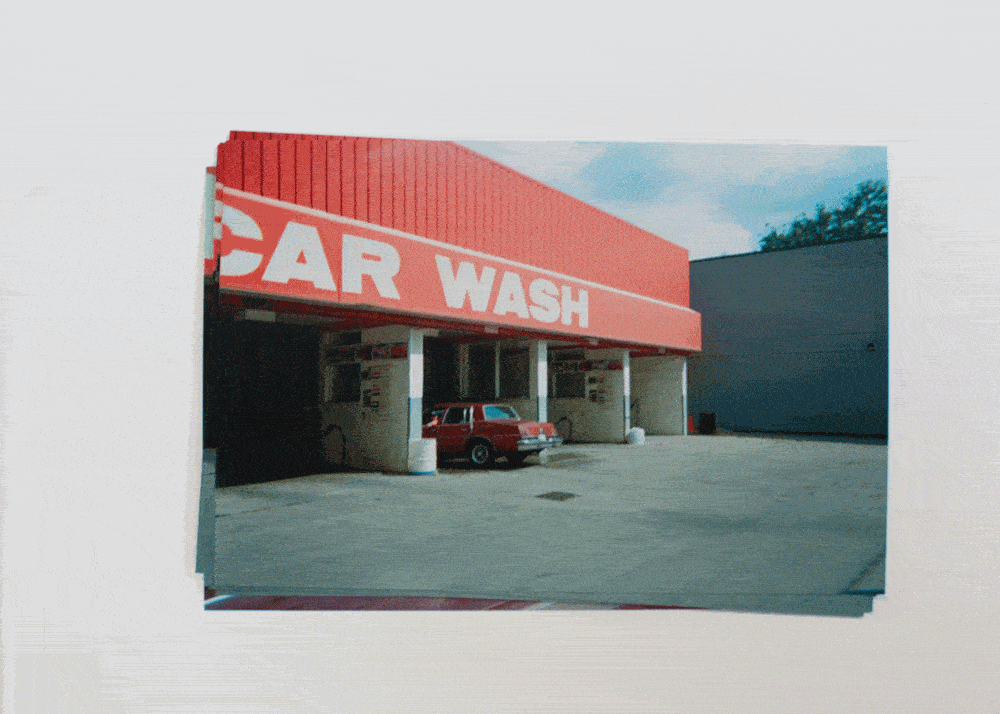
For her flip book, Toronto-based Sadie selected a car wash with a retro feel as the location. Other good options might be ice cream melting on a hot day; people skiing or tobogganing in the winter; a concert with lots of dancing; your next birthday party. Any setting with some interesting movement will work. It might help to think of a beginning, middle, and end for your flip book. In this case, the car starts out dirty, goes into the car wash, and drives away clean. It’s a super simple story, but makes for engaging images.
Sadie chose to add texture to her flip book by using the colored flash filters that come with Lomography’s Simple Use Cameras, adding a red hue to some of her shots. “If you look at the photos you’ll notice the car when the car is dirty before being washed, those frames are red and as the car gets cleaned the filter fades away,” Sadie says.
Step three: Get shooting
You’ll want to make sure you have enough photos to create a flip book with lots of motion. For her flip book, Sadie shot 83 frames, which used up just under three rolls of film. The result is four GIF-based flip book stories. When shooting images for your photo flip book, you’ll want to shoot fairly quickly to capture the movement in front of you. Shooting more slowly will result in a flip book with jerky motion, whereas shooting faster will lead to a more smooth flip book story. You can pace your shots depending on how you want your finished product to look.


Step four: Get your photos printed
Whether you shot on digital or film, you’ll need to get your photos printed if you want to make a physical flip book. Take your negatives to the lab or develop them in your home dark room, or get your digital photos printed out. You might want to get your images printed onto cardstock, for greater ease of page flipping. Regular printer paper would work too, though, and also makes for a low-budget flip book.
If you decide to make a GIF flip book, like we did, you can skip this step! Although you’ll still need to get your negatives developed, of course.
Step five: Put your flip book together
We decided to create a series of photo GIFs to better share Sadie’s finished flip book project with our readers. You can also use Photoshop to put your flip book together digitally, especially with the help of this step-by-step tutorial, which explains how to create a GIF from a series of moving images. We decided to make a series of four GIFs.
If you want to make an IRL flip book, you have a few different options available. If you’ve gotten your 35mm photos printed, you can put these together into a book. A simple option is to punch two holes along the left side of each photo (make sure they all line up), and then thread some string, ribbon, or twine through these to tie all the photos together.
If you’ve printed your images onto cardstock or regular paper, you could just staple them together along the left side for a super simple flip book. If you’re feeling very crafty, and you have a drill handy, this Photojojo tutorial shows in detail how to create a fancy flip book using screw posts and a very large stack of images.
Another option, which isn’t too labor-intensive but will yield a polished result: using glue to bind the edges of your flip book together, just like a real book. You’ll need a thick, heavy glue, like Mod Podge, and also some clear packing tape. Stack all your photos together, and attach tape to the top photo, wrapping it all the way around to the last photo. Then remove the rest of the photos, keeping them stacked, and you’ll see you have what looks like a little book cover, with the tape exposed in the middle. Fill this center piece with glue, and then insert the rest of the photos here. Check out this tutorial for photos of the process and a look at the final result.
Take a look at our flip book results below. We’d love to see your finished flip books, too! Share them with us on Twitter or Instagram, and we’ll be sure to repost our favorites.
Find more of Katie Sadie’s photography at her portfolio, built using Format.

More analog photography projects:
Why You Should Try Soaking 35mm Film in Ramen Soup
A Guide to Developing Film in Beer
Review: Lomography’s Lomo’Instant Wide for Instax Film is Addictive