If you’ve been shooting for a while, you’ve probably come to the realization that an extremely important part of mastering photography is getting a really good handle on lighting. Whether you’re working with natural light or in a studio, the best photographers know how to make the most of both the light and their equipment to capture their subject in interesting ways.
Learning the essentials of key light photography will help you create a wide range of effects, so you can capture the perfect image no matter what look you’re going for and really set your professional photography portfolio apart from the rest.
Photography is a bit like painting with light. The same subject sitting in a studio can go from looking glamorous and flawless to dramatic and ominous just by switching up the position of your key light.
Since the way a scene or subject is illuminated has such a huge impact on the mood of your image, becoming a master at lighting, including key light photography, will help you give your photography clients exactly what they want. No matter what message they want to convey, you’ll be able to bring their vision to life.
Key Light Photography Basics
So, what exactly is a key light, anyway? Although key lighting was originally a cinematography lighting technique, it’s now a common lighting technique used by photographers. Just as the name suggests, your key light is your main, or primary, light in your lighting setup. Depending on your shooting style or goals, you can create a complex lighting setup involving a key light and several other lights to illuminate different parts of your image, or you can create a gorgeous, well-lit image using just a key light and nothing else.
Your key light can be placed on the same horizontal plane as your camera, or you can play with low key photography and high key photography by placing your light source at 30-60 degrees below or above the camera.
Where you decide to position your key light relative to the camera and your subject will have a dramatic effect on your end result. High key lighting photography will typically give you a blown out and elegant look. Low key lighting photography is great if you’re going for a dramatic, high contrast effect.
Let’s get into how to use both of these setups!
High Key Photography
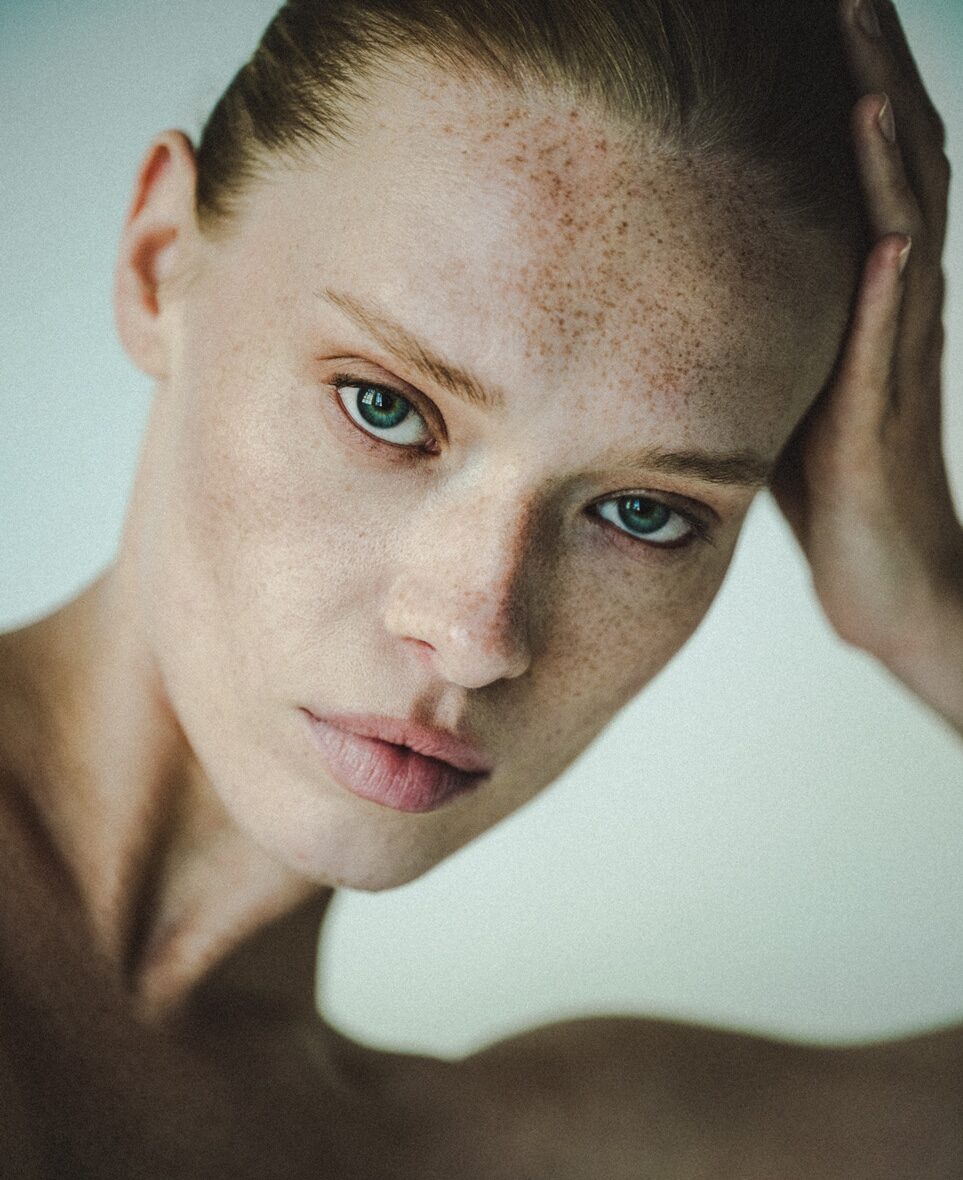
If you want to minimize the shadows in your image, high key lighting photography is the way to go. If we think of photography in terms of painting with light again, using high key lighting will mean that your final image has brighter whites, lots of highlights and light tones, and fewer shadows and midtones.
The fact that you’re minimizing shadows means that your subject, especially if it’s a person, will look even and unblemished. High key photography is a way to soften things like fine lines and wrinkles without having to touch that blur function in your photo editor! A high key portrait will flatter anyone, no matter who your subject is.
If you’re a family photographer, for example, you’ll most likely want to use this setup. High key lighting photography creates a bright, happy mood which is perfect for family portraits. It’s also a great option for lighting multiple subjects at once, so it’s exactly what you’ll need if you’re shooting a family or a group in a studio setting.
It’s also probably a great choice if you shoot corporate or acting headshots, pet portraits, or anything else where your client wants to evoke a positive mood. Your images might read as more “commercial” than “artsy,” which is perfect for certain photography jobs. Think about it: are you more likely to hire the accountant with a bright, trustworthy LinkedIn headshot, or the one with a dramatic, shadowy photo? Your clients depend on you to convey the right messaging in the photos you take for them, so knowing how to key light them to look their best is a great way to boost those bookings!
Another feature of high key lighting photography is that it usually creates an evenly lit scene. This means that it’s also an awesome choice for food photography and product photography. Sometimes you want shadows in these types of images for dramatic effect, but most often you’ll probably find that your client wants a flawless, evenly lit and upbeat final product.
So, what kind of light source should you use for high key photography? Usually, you’ll want to choose a larger, diffuse source, such as a large softbox or umbrella, and to place it at least 5 feet away from your subject. That way, you’re minimizing shadows and creating even light over your scene.
You don’t need to place the light too high over your subject: usually, 30 degrees is perfect. This will help you achieve soft, smooth skin, and that attractive catch light in your subject’s eyes.
Low Key Photography
We’ve talked about the many situations in which high key lighting photography is your best bet, but what about low key lighting photography? If you’re trying to achieve a high drama final product, you’ll definitely want to learn more about this lighting set up.
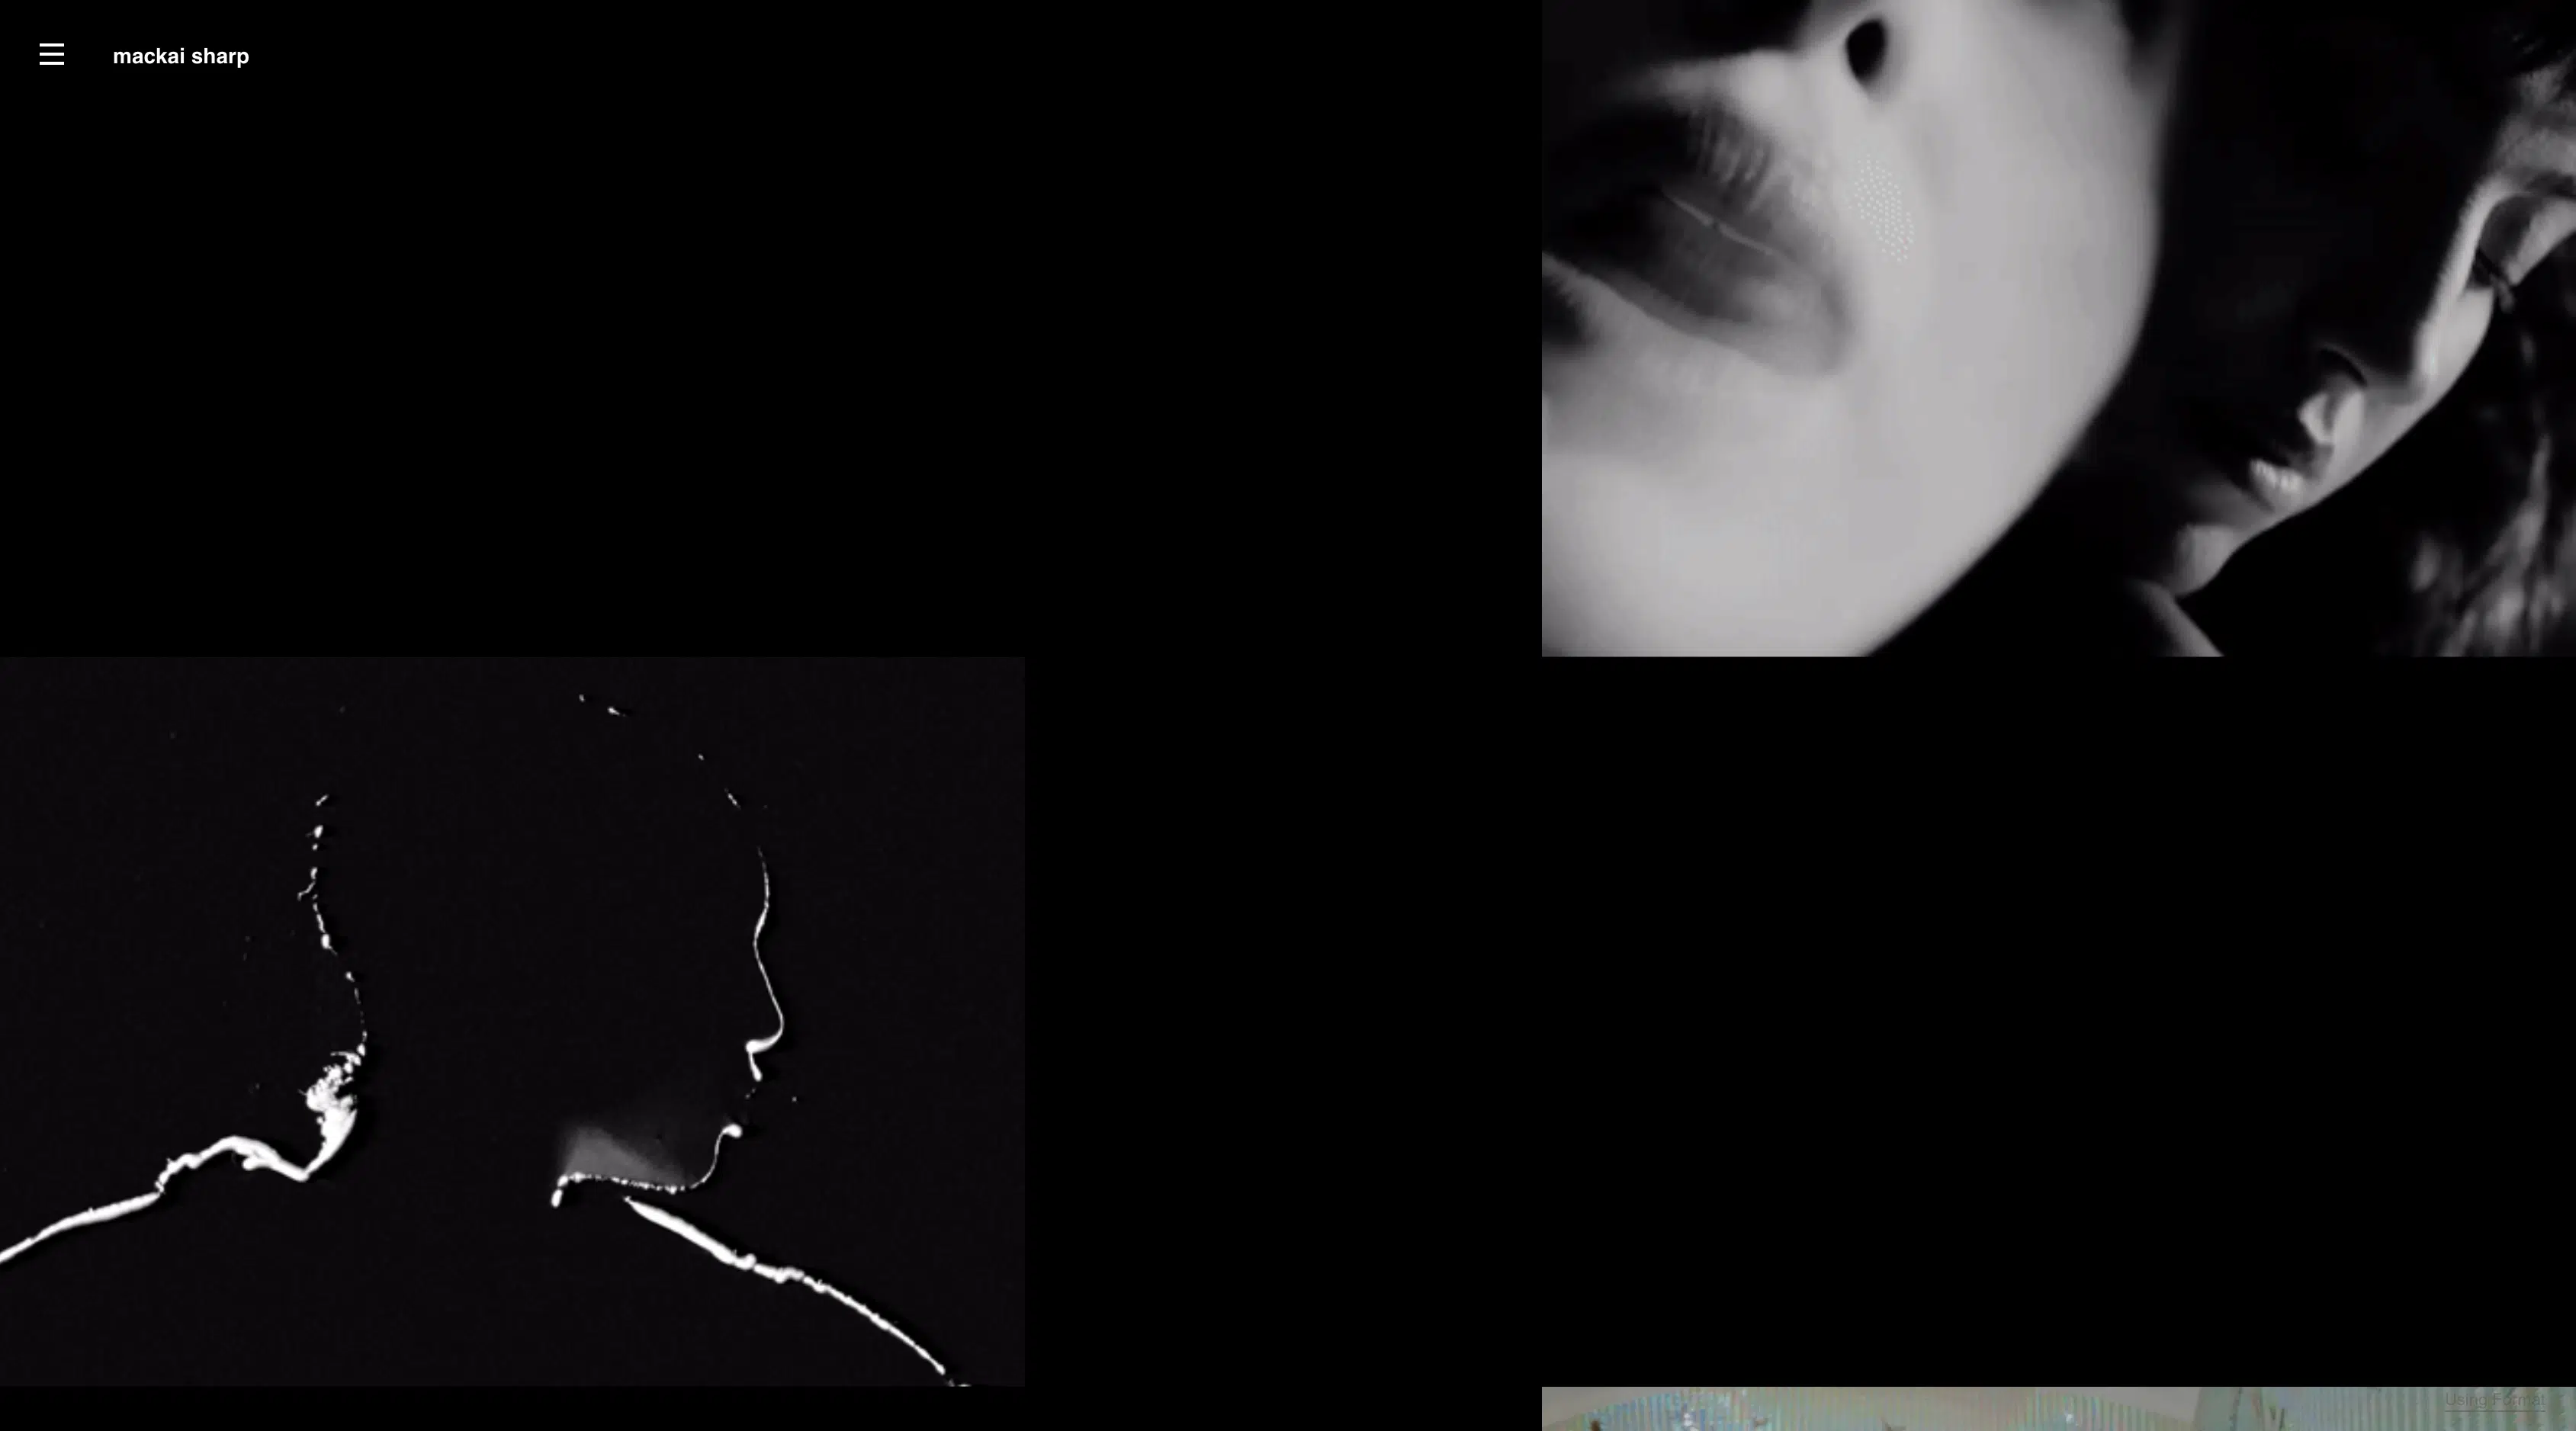
Whereas high key photography evokes a bright, upbeat mood and emphasizes lighter tones, low key photography will make your blacks super deep, emphasize your dark tones, and create lots of shadows. By contrast, your whites and highlights will be minimized. Overall, images shot with low key lighting are shadowy, high contrast, and overall much darker than their high key lighting counterparts.
Playing with high contrast photography and hard lighting conditions is an awesome challenge for any photographer wanting to boost their skill set and portfolio, because it can be tricky to get it just right. The final product when shooting under low key studio lighting conditions can be really stunning. If you’re going for a dramatic, moody, or mysterious final image, low key photography is the way to go.
The transition from light to shadow in high key photography is super subtle, but in low key photography, it can be as dramatic as you want.
There are lots of really creative directions in which you can take a low key portrait. It can make your subject look serious and dramatic, or mysterious and sexy. This also means your photographs can feel really charged with emotion.
If you’re a photojournalist, this technique will really help your images pop. If you want your subject to look really important, a low key portrait can help you achieve the right effect.
Maybe your focus is more on art photography. If that’s the case, you can use low key lighting to create an artistic effect by hiding certain parts of your subject and emphasizing others. For example, you can have part of your subject’s face illuminated and the other almost completely in shadow. A close-up low key portrait can be extremely powerful, so make sure you play with photo composition when shooting your low key portraits.
Because of the high contrast effect that low key lighting photography produces, it’s a great choice for any images that you’re planning to deliver in black and white. A more blown out high key portrait won’t gain much by being rendered in black and white, but a low key portrait, with all of its dramatic contrast, will look amazing in black and white.
If you’re wondering how to set up your key light in a low key photography setting, consider the fact that your goal is to emphasize contrast between dark and light. Because of that, you’ll probably want to place your light source a bit closer to the subject than you would with high key photography. You’ll also want to use a smaller, less diffused light source.
In terms of positioning, the best way to figure out where to place your light source relative to the subject and camera is just by playing around a bit and taking some test shots. If you go too low, you’ll probably just create some really unattractive shadows rather than the artful, dramatic look you’re going for.
Although key light photography is usually thought of as a studio technique, you can definitely bring it into your outdoor photography as well. You can achieve an awesome low key portrait or image outdoors, without even bringing a strobe or light. Car high beams and campfires can become the perfect low key photography set up if you position your subject correctly relative to the light source.
When it comes to the correct camera settings for low key photography, you want to make sure that you keep your ISO low so that your image is crisp and you don’t get unwanted noise. Since you’re shooting in low light conditions, playing around with your aperture and exposure settings until you’re letting in the right amount of light for your desired effect is the way to go. Just make sure you don’t crank up that ISO, because your final product won’t be crisp. Brushing up on your night photography skills will definitely help you with this.
Now that you have an understanding of low key photography, high key photography, and when you’ll want to use or the other, you can think about lighting setups that use more than just one light source. While one light, used correctly, can be enough (did you know Annie Liebowitz’s timeless portraits often use just a key light?), lots of photographers choose to use a fill light to illuminate the background of the image. You can also add a backlight for a standard three-point lighting set up. You’d only use this with high key photography; low key photography typically uses just the one strategically placed key light.
That wasn’t so hard, was it? Now that you’re able to create some really stunning, professional and expertly lit photographs, make sure you upload them to your online photography portfolio so that you can show them off. Don’t have one yet? No worries; building a photography website is really simple, as long as you choose a good portfolio builder with all the features you need to make all those awesome new low key portraits look their best and help your clients easily find all the information they need.
Make sure you choose a builder with lots of beautiful pre-made templates. That way, the heavy lifting of website design is done for you. All you have to do is customize the theme to your preferences and to match your branding, and add in your photos.
You’ll also want to make sure your website builder makes it easy to create custom pages. Since every photography business is different, you want to be able to create the pages that are important for your business, with the information that your customers will be interested in. For example, a wedding photographer should definitely have a price info page, but that might not be so important for you if you’re an art photographer primarily selling through galleries.
E-commerce integration is another feature to look for. If you want to sell images or services online, this will mean you don’t have to deal with annoying e-commerce integrations to get your site up and running.
When you’re setting up your portfolio, make sure you’re curating your images and highlighting the ones that will really help you sell your product and service. You put all that time into mastering lighting and other aspects of photography, so make sure you showcase your best work!
Now that you’re ready to get out there and shoot some awesome key light photography, we can’t wait to see what you create!
Love shooting in interesting lighting conditions? Read on!
How To Photograph Lightning
What’s the Best Time to Take Pictures Outside?
Here’s How to Master the Art of Long Exposure Photography