30 Food Photography Tips Every Beginner Should Know

Making a delicious meal look as appetizing as it does in real life in a two-dimensional, odorless format is no small feat. People eat with their eyes first, so taking good photos is essential to making food look appetizing.

We unconsciously turn to colorful and creative food photography, making food photography one of the most popular genres on social media. Whether you’re a pro or a beginner looking to create a portfolio, these food photography tips and tricks will help you take the best photos.

Avocado and Egg Toast

Experiment with lighting

1. Use natural light.

The most important thing to consider for any type of photography is lighting. Oftentimes, overhead lighting makes food look flat and can even distort colors. Kitchen and restaurant lights tend to be more orange-yellow, so place the food near a window where the natural light can enhance the colors of the food. Shooting in direct light gives you interesting results, but takes a little more practice to perfect. A window giving diffuse light rather than direct sunshine is often a better choice. 

2. Don’t use a flash.

Try not to use a camera-mounted flash for food photography. Lighting pouring on the face of your subject will flatten your dish and remove any delicate natural shadows present. Unless you use a studio with special lighting equipment, your best option is to use a reliable tripod and a wide aperture. 

3. Use light modifiers. 

Similar to using different lenses on your camera, you can use various light modifiers on your light source. Modifiers help you control the way the light hits your subject. A large modifier makes the light softer and diffuses it over a larger area. Smaller modifiers direct the light to a smaller area, creating stronger shadows and contrast. Some examples of modifiers you can use are diffusers, reflectors, foam boards, grids, snoots, umbrellas, and softboxes. 

Use equipment to your advantage

4. Adjust your camera settings. 

Your camera settings play an important role in the rendering of your images. You can create different kinds of exposures and set the mood you want by adjusting the aperture, shutter speed, and ISO of your camera. Shooting in manual mode gives you complete control of your settings for the best exposure and sharpest images. 

5. Invest in a quality lens.

People think that to create the best images, you need the best camera. But the truth is that a good lens is often a better ally than a camera. Camera functions are constantly updated. The sensors are reworked and get better and faster as the model changes. But lenses don’t change much, and if you look after your lens properly, you can use them for decades. Get a prime lens with an aperture of f2.8 or less to create a large depth of field and sharp images in low light. Before investing in them, you can always rent out the lenses to see which one suits your food photography style the best. 

6. Shoot tethered. 

Shooting tethered is a great way to immediately improve your images and experiment with your composition and food props. With your camera tethered to your computer, you have the ability to instantly look at your images on a much larger screen. When you review your images on the go, you can make the necessary adjustment to understand what works and what doesn’t. 

7. Use a tripod. 

There’s nothing worse than perfecting the composition of your photo, then going home to discover that a slight shake of the camera has rendered your image blurry. Using a tripod allows you to shoot with a slower shutter speed without the risk of a camera shake. Tripods are useful in low-light settings as you can still use your lowest ISO settings for the best image quality. 

Include the right props

8. Add a good background.

You don’t need expensive equipment to take your food photography to the next level. Instead, invest in one or two professional backgrounds. Choose backgrounds that are textured, have a few different hues, and generally have a ‘blue’ feel to them. Select backgrounds that have blue/gray or blue/white hues. A well-textured background adds to your food story and increases the luxury element of your photo. 

9. Use ingredients as props.

Adding fresh fruits and vegetables as props to your food photography will make your photos more vivid. The little pop of color and texture draws the viewer in and makes the food appear homemade, even if it’s not. Choose the items that go with your dish. Having a lemon next to your omelette will only confuse viewers. 

10. Spritz up your ingredients. 

Adding fresh ingredients as props to your images will bring more life to the overall image. However, spraying a few bursts of misty water on them will transform your photo. Fruits and vegetables that are used to create additional interest will now look like they were just picked from a dew-drenched garden.

11. Include a human element. 

Including someone in the photo gives viewers someone to identify with and perceive the image as if they were a part of the scene. You can add anyone, from a chef cooking to a hand reaching for the food, a gathering, or a child holding an ice cream cone. Including human elements is also quite common in landscape photography as it adds a sense of depth and visual appeal to the photograph. 

12. Don’t be afraid of dark props.

If you don’t have a signature style, try not to get stuck in one way of seeing things. Certain foods are often shot on lighter surfaces with brighter lights to capture their freshness. Bright and fresh is a great look for a food photo, but it’s also to be expected. You can use dark props on a dark background to bring out the colors of the food on the screen, albeit in a darker style. 

Take your time composing your photos

13. Choose the best angle. 

Like people, food also has angles that work best for it. Hovering your camera directly above the food and shooting is one of the easiest angles. This works well for 2D dishes that won’t really benefit from any other angles. The 45-degree angle is from the perspective of you sitting at the table. This angle is most appealing as viewers can imagine themselves enjoying the food. Position your lens at the same height as the food. This is the perfect angle for tall foods, such as drinks and stacked foods. This accentuates the size of the item and allows the viewer to appreciate all its layers, colors, and textures. 

14. Add some charm.

If you are photographing a cake and some crumbs fall on the table as you are cutting a piece, take a look through the camera before cleaning it up. Having a little mess like crumbs might be worth leaving in the image. A slight imperfection like this adds charm to the image and makes the recipe more accessible. Rigid perfection can sometimes make recreating the dish at home seem like a daunting task. 

15. Add some drama.

Use contrast to place a key eye-catching subject in your frame. Highlight your main dish by darkening the background or muting other dishes in the photo. When you contrast a muted plate with vibrant food, you immediately introduce drama into your composition. 

16. Less is better. 

It may seem obvious that the star of your food photography should always be the food, but it’s easy to get distracted when playing with composition and props. Anything you add to your image should help enhance and support your main dish, rather than overshadow it. Most photos use negative space to allow the subject to breathe and direct the viewer’s attention. 

17. Try diagonal lines. 

Beginner photographers often place things parallel to the edges of the frame, creating vertical and horizontal lines. Aligning things in a straight line can be great in real life, but for food photography, parallel lines often appear boring and unattractive. Placing your elements diagonally is a great compositional strategy and it adds movement to the frame. This doesn’t mean you can’t use horizontal or vertical lines, just be mindful when doing so. 

18. Play with the composition. 

Don’t be afraid to rearrange the items in and around your plate, even adding some inedible items. Treat each photo as a work of art and use the various composition rules to guide your viewer’s eyes across the image. Knowing in advance how the food will react to your shooting environment can also give you the opportunity to come up with creative ideas.  

19. Edit your photos. 

Do not post unprocessed RAW or JPEG images in your food photography portfolio or on your social media sites. Use free or premium photo editing software to bring your images to life, while keeping the colors as close to reality as possible. Editing includes adjusting white balance, saturation, contrast, and anything else your editing style needs.

Style your food for stunning photos

20. Use layers. 

Add items like napkins, cutlery, stacked plates, crumbs, and even a newspaper to add more depth and interest to your images. You can use a similar method to arrange the main dish as well. It’s easy to get carried away with adding these extra props, so make sure you don’t add items that are too busy or could distract from the main dish. 

21. Portray movement in the picture. 

Even though it’s a still image, we want it to look more dynamic. The goal is to make the image appear as if something is happening in it using elements like swirls or crumbs. The direction in which you choose the movement also helps guide the viewer’s eye through the elements in the image. 

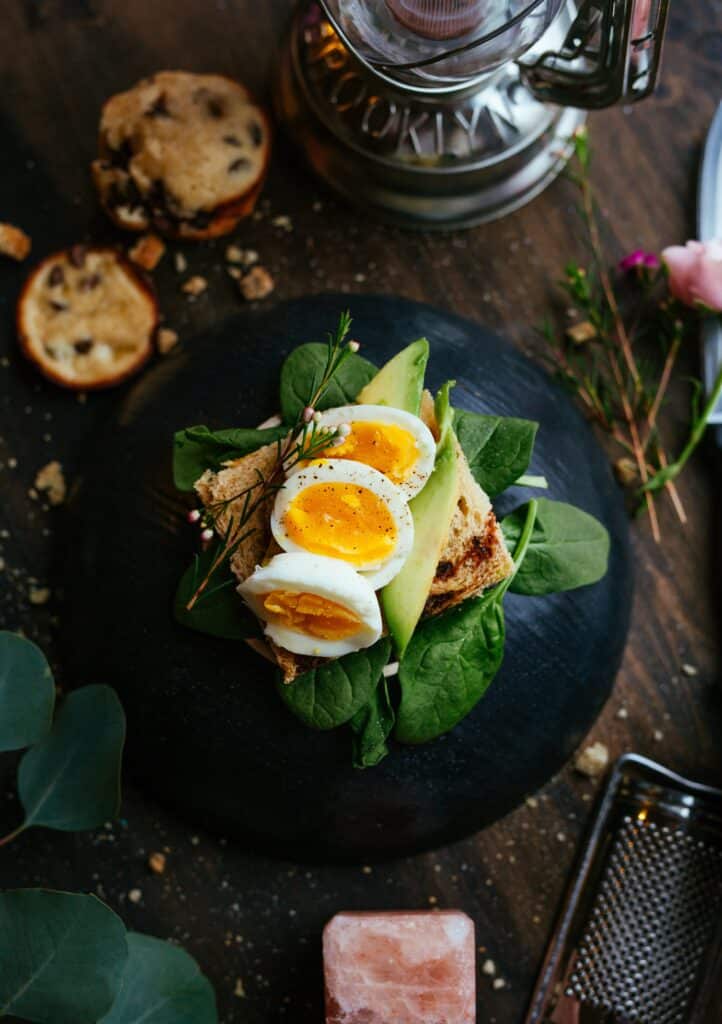
22. Experiment with textures.

Most of the time, the food itself will have multiple textures or layers. For example, if you cut a piece of orange, you can see the texture inside, compared to its smooth exterior, which can attract the viewer’s attention. If your food doesn’t have a lot of natural texture, add garnishes and props. Sprinkle some seeds, add a side of sauce, or dip in your image to create the impression that your food is crunchy, chewy or any other texture you’d like. 

23. Create a lush effect.

When taking food photography for social media pages, it’s important to consider the staging of the food. For a lush effect, the food must look luxurious. So use as many colors, textures, shapes, and types of food as possible in the most decorative way possible for a magical effect. The food must appear fit for royalty. 

24. Pay attention to color. 

When it comes to food, the most important element to consider is color. Use seasonal ingredients and image retouching to bring out the colors on the screen. If you have a soft, muted background, use foods that have radiant colors that jump out of the photo. You can also use colors like red or yellow that evoke emotions. Learn the basic combinations of the color wheel and the effect certain combinations have on viewers. 

25. Use different shapes. 

When creating an overall scene, the shape of the food layout can guide the viewer’s eye and create a focal point. Add interest using the shape of the food or cut ingredients. For example, if you have a round plate, you can use foods of different shapes and structures to create interest and define the overall scene. 

26. Create a food story. 

Having a narrative will help you compose, style, and light your food subject. Create a story that evokes emotions and nostalgia in viewers. For example, imagine a photo of a steaming cup of coffee on an otherwise empty table with a dark background. Now imagine the same cup of coffee near a window, next to an open book. Although the subject is the same, the story it conveys is completely different. In food photography, you can do this by documenting the cooking process, or showing where the ingredients were sourced. 

27. Don’t let the food sit

As your dish waits to be photographed, over time it starts to look unappetizing and tired. Many dishes with lettuce leaves and herbs quickly wither as soon as they are placed on the table. Meat dishes tend to dry out as minutes pass and will need to be lightly brushed with oil in order for them to come back to life.

28. Consume beautiful images. 

Looking at the work of other photographers in your field can help spark your inspiration. The simplest way is to spend a few minutes every day browsing through Instagram accounts that specialize in food photography. If you’re unsure about the account names, check out the top social media hashtags related to food photography. 

29. Collaborate with other food photographers. 

Start small for your first collaboration with a photographer. It takes time to understand people’s communication styles and workflows, so it’s best to start with something simple. When providing feedback, ask it like a question. This is a good way to get into the person’s thought process. Questions like… “how can we make it seem more…” or “is there a way to…” are good starting points. 

30. Keep practicing. 

Every food photographer has his or her own style. You can only develop a signature style by experimenting with different angles, techniques, and lighting. There are many resources that can guide and inspire you. You can find inspiration in cookbooks, culinary magazines, advertisements, and social media. 

Food photography is an art that requires patience, creativity, and high skill. As a photographer, you must capture the essence of food in an attractive and appealing way. Whether you are a beginner or an experienced food photographer, having a portfolio is essential to showcase your work to potential clients. Format has plenty of templates that you can use to create your food photography portfolio. 

Ready to Get Started?

Let your food photography shine with a unique online portfolio website.

Start Your Free Trial
en_USEN